Tuning Guide Blogs
Weymouth Venue Guide
Although WPNSA at Weymouth can be a great venue to sail in Weymouth Bay, most of the Championships I have raced there, have been mostly been sailed inside the Harbour.
This has been true of the ILCA (Laser) Nationals, RS300 Nationals, 2000 Nationals and numerous qualification events over the years. The harbour is rather large and can often have more wind than the bay, but there are some quirks that you might want to take note of:
Wind from the:
North
If the wind is light, the wind can bend around the Nothe point giving a right-hander at the NW section of the bay. Likely to oscillate from the land so track the wind. It will be gusty.
East
Clean wind May move right on a sunny day (rare to get a SE sea breeze) but possible enhancement if easterly gradient might get waves/swell near entrances.
South East
Portland starts to play a role, the east side of the harbour will have cleaner wind than the right, wind shadow near the academy area, prominent wind bend around the Bill, left-hander at the top of the beat.
South
Wind will bend around the bill, depending on how south the breeze is the East side of the harbour will be very light and patchy best bet to go middle right and play the shifts.
South West
Compression effect and bend off the bill, top left always good, hard right never pays, you will steadily head off the line tack to take advantage of the shift on port to the mark, Keep on the bill side downwind.
Sea Breeze
This usually sets in around 210 and moves slowly right to 240 and can get fresh, bends as per the detail above.
West
Clean wind with pulses of breeze (rolling over the causeway) If in the northern part of the harbour you may get influence from the land to the north.
North West
Gusty and shift as it rolls off Weymouth and the hills, Gust and Shift sailing, eyes out of the boat for pressure.
Tide
This is negligible in the harbour, check the buoys in the area as you sail out but less than 3/4 kt (maximum near the gaps in the harbour wall).
Europe Mast Thinking - the Danish Development
When I was coaching the UK Europe Squad back in the late 90's, I had some technical help from Sid Howlett who at the time was Ben Ainslie's technical coach for the Finn. Sid explained that standard Finn mast bend profile was: The mast should have 100% of the fore/aft bend number at the half point (between the bands) with 50% at the quarter and 50% at the 3/4 point. Effectively a perfect segment of a large circle which makes fitting the sail to the mast very easy especially with increasing or decreasing sheet tension. We have to hope that the mast will bend uniformly with increased tension in your sheet - which if it has this bend profile means it probably will. The side bend profile was harder to describe. But Sid wanted 20% of the side bend 1/4 from the hull and 80% of the side bend at the 3/4 point - this measured with a tip weight. Now don't confuse the side bend numbers given by the mast manufacturer with the actual side bend as what we want is away from vertical and the mast is measured from tip to black band. Below decks - the mast should be super stiff sideways - and springy fore and aft. A springy fore and aft mast below decks might enable more gust response as the gust will attempt to open the leech - the spring would then allow the mast to vent aft , opening the leech whilst maintaining the correct mast bend between the bands, which is like an automatic raking system for breeze.
As the wind reduces then the mast recovers (springs forwards) again and the leech returns to the correct profile by itself. Too springy fore and aft and you struggle for leech tension when working the boat hard.
A below deck springy mast also helps to absorb over sheeting tension and makes up for under sheeted tension. Just imagine if the mast was a solid rod fore and aft - and the perfect leech tension was somewhere between one click on and one click off your ratchet block. That would be frustrating. The spring below decks allows the mast to self govern the power you take in the gusts.
The other conceivable advantage is that you might have to set up your rake slightly further forward to compensate for the spring - which adds to a more upright mast for downwind sailing.
Having said that, the bigger sailors are not looking for much gust compensation as they are keen to take the power. This early venting is great if we are sailing in waves as you want the rig to vent and recover on every wave. If you want to sail high on flat water, perhaps you are looking for less springy under the deck to give you a high power mode.
The Europe coaches at the time were guided by the Finn concept of mast bend. During the Olympics - many of the sailors had mis-interpreted the mast numbers given by the standard measurement system. They thought that a small number at 1/4 point from the bottom of the mast in the side bend graph meant stiffness - when actually it means flexibility. Think of it as the other half of the measurement away from the vertical as the number you see from the mast maker is not the offset from vertical - but a number that relates to how the mast bends relative to a line from the tip to the lower band. So bigger numbers sideways at the bottom mean that the mast has not bent at the bottom - so it's stiffer. This stiffer number gives more height to windward. This lesson was a hard one for many Olympic sailors and coaches as they also misinterpreted this number and struggled to hold their lane at the Olympics (or so it is rumoured).
"The Danish Concept is different":A concept that was largely started by Danish sailors was they wanted a mast that had the same fore aft bend numbers as the side numbers - so that the sail's luff curve would always fit downwind, even when the leech was open and twisted. This makes the masts more even in bend and less gust responsive in the top compared to the Finn concept masts which have much more sideways bend at the 3/4 point. However, the sails for the Danish concept tend to be slightly flatter in the head allowing for less vang tension downwind. The boat is easier to handle downwind in breeze as the mast tip does not bend as much towards the bow and the boom is less close to the water due to the less vang required.
I was very much interested in this concept, especially when UK Sails took the first three places at the 2020 Danish Europe Nationals Championships. My experience of bendy tip masts (the Finn concept) was that they caused sticky conditions in the light as the sails caused too much hooking (as it was made to compensate for increasing sideways bend in stronger breezes). Unless you used two sails - one for light with less return in the leech and one for windy that was cut for the increased sideways mast bend. So the Finn style bend profile tends to use multi changes of sail throughout the conditions to make the optimum speed. This would certainly mess with my head so I was happy to use the Danish concept and stick with a one mast, one sail setup with a Danish UK Sail.
ILCA/Laser Toe Strap Adjustment - Simples (V2)
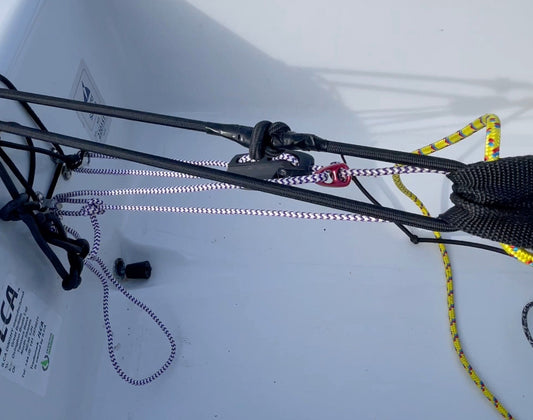
Roosters offering for an adjustable toestrap for an ILCA®/Laser (now legal) This uses 2m of 4mm Easysplice Continuous Control Line a Clamcleat CL 828-68an and a single 5mm Shock Block The 5mm shock block has been added to our kit in May 2023 to improve the effectiveness of our offering.
We can supply the New Rules Toestrap Adjustment System for the ILCA/Laser as a kit to make it easy.
The video below helps show you how to rig it. Its actually now really simple.
If you have already purchased the previous version (pre May 2023) you can re use the rope and cleat. All you need is to purchase the single shock block - its a 5 minute change. once you have undone your knots.
Racing a Solo as a Lightweight
I have always thought of myself as a lightweight whilst racing the Solo. In 2022 I was 74Kg which was not the lightest or heaviest I have been over my 35 years of Solo sailing.
Actually the Solo is quite forgiving for lightweights as its not really a boat for 'bow- down' windward beats, drag racing to the corner. Sailing to windward is not as compromised in the Solo as it would be in say a Laser or Aero where vang sheeting when overpowered seriously compromises pointing.
Height is king in the Solo fleet which makes the shifts drive the tactics around the course.
Once you start sailing on waves and big winds, only those lightweights who have a good technique and good equipment will hang in against the bigger teams. The hull needs to have its weight centralised as much as possible. I also changed my battens for Carbon Battens and used the D+ no sleeve as it has minimum weight and even changed my forestay for the lightest weight possible under the rules as all of these will help stop the boat bobbing in the waves upwind.
I also used for the first time an E&V rudder blade that was just under 1Kg ( 953g to be exact ). We have been testing this with Mark Harper for the winter series of 2022/23 at Dell Quay to test its longevity in extreme conditions before we put it on the market. That's a nice saving of at least 0.5Kg at the end of the boat! It will be on the market quite soon.
Wave technique explained:
First principle - you want to help the boat match the waves as you sail over them. As the boat is in the transition from bow down to bow up (the gap between the waves ) its then that a short stab away from you with the tiller will help lighten the bow, reducing the impact of the crest, this also allows you to enjoy the apparent wind lift lift due to the rig moving slower than the hull. The rudder in push mode with a little heel sinks the transom to lift the bow. - and when pulled, lifts the transom and stops the bow from taking off the top of the wave. One really needs to get the bow to stick to the back face of a wave to begin the journey back up the next wave.
Check out these techniques explained in more detail on the Boat Whisperer DVDs - Upwind - (digital download version).
Effective Hiking:
When you are on the small side, its really important to minimise bum droop hiking. The side deck of a solo actually encourages you to droop your bum over the side - but this adds to your boats heel as you also then try and keep your bum away from the water; it also makes for painful hiking. Better to have tight grippy toe straps (the Rooster version is excellent and uses tenara® thread as the rubber grip is soo grippy) so you can point your toes without falling out; pointing your toes helps straighten your leg (bit like a ballerina) which helps maximise your effective height - and with less stress to boot. Your femur is the longest leg bone - if you droop hike it points downwards - if you hike with pointy toes and a straight leg - it points outwards. I tend to strap my feet to the coffee table with the toestrap which holds my knee down to the side deck and gives my hiking short battens the best effect at holding my bum up. Boots that also hold your foot whilst you can still point your toes is also a must. I prefer the Pro Laced version.
Gear wise:
I used the Winder Mk1 in 2006 and the Boatyard at Beer in 2014, coming second in both of them. Twenty years on the Ovi/Rooster/Ginger (you know what I mean) achieved another second in 2022. I think the results speak for themselves.
I am a fan of the Selden D+ mast (no sleeve). Perhaps because is works so well when vang sheeting. In the past I have let the shrouds go a little, but in 2022 I used the standard set up and was fast upwind and downwind in the light and in the breeze.
Taxi's HD design was a standard cut sail used on 6001 and behaved flawlessly throughout the range of conditions.
P.S. 6001 is for sale to a good home as I can't be at two regattas at the same time.
Rooster RS Aero Halyard upgrade by Sammy Isaacs-Johnson
The new design Rooster RS Aero 5mm Pro Halyard Loop is a simple way to reduce troublesome slippage that occurs while sailing your RS Aero.The idea was formed at the 2022 RS Games, with complaints of sails being hard to pull up, falling down the mast, or even snapping. There had to be a simple, cheap solution to this challenge.Made using Rooster 5mm All Spec-Pro, with its hard wearing 16-plait cover, tapered by our expert splicers into the super strong and thin 3.5mm core this newly designed Halyard Top glides up the mast with ease and bites into the mast-head cleat and holds strong for your whole sailing session.This cost effective solution to halyard replacement is very simple to install. Just cut your old Halyard top off, put your bobble onto Rooster RS Aero Halyard Upgrade, and half hitch (or sheet-bend) your current halyard tail on and away you go!Having now sailed using this new design for 6-8 months, I can confirm it’s the best solution for keeping that sail pinned to the top of your mast.
What’s The Difference Between a Phillips and a Pozidrive head on a typical screw?
When you purchase self-tapping screws or machine screws from Rooster, make you you use the correct screwdriver for the job....
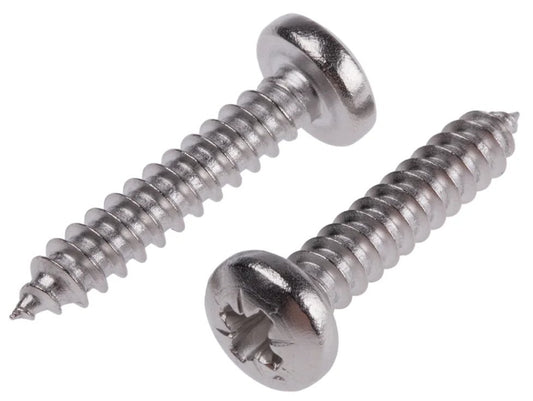
A typical Rooster pan headed self-tapping screw as used in the ILCA/LASER. (Pozidrive head)
SELF TAPPING SCREW GAUGE 10 X 1.5" POZI PAN HEAD - LASER/ILCA SCREW - A4 STAINLESS STEEL
A typical Topper machine screw (Pozidrive head)
A TOPPER Y15 TRAVELLER CLEAT SCREW - SINGLE - A4 STAINLESS STEEL
The image below highlights the difference on the screwdriver head, which corresponds with the difference in the screw recess pattern.
(And just so you know, whilst we use the common UK spelling Pozidrive, Pozidriv is actually the original brand that the term derived from).
Phillips heads have a tapering recess that is designed to “cam out” or slip under heavy torque, to prevent the head from being torn off the screw – screws with no heads are a nightmare to remove!
As you can see the splines on the head of the Phillips screwdriver also taper in at the tip to fit correctly into the recess on the screw head.
On a Pozidrive screw head, the recess is parallel rather than tapered, to enable higher levels of torque to be used without the risk of slippage – this makes it ideal for use with power tools. The diagram shows that the splines of the Pozidrive screwdriver are parallel all the way to the tip, with no taper. For ease of identification, Pozidrive screws always have two diagonal lines on the screwhead intersecting the cross.
If you have no other option then you can use a Phillips screwdriver on a Pozidrive screw for low torque applications, but there is always a risk of damaging the head.
You cannot use a Pozidrive screwdriver on a Phillips screw as it will not fit all the way into the recess – it will only damage the screw head.
A typical PZ screwdriver shown above.
Typical valley cleat fitting, using 2 no. Pozidrive self-tapping screws to attach.
Stainless Steel v Monel Metal
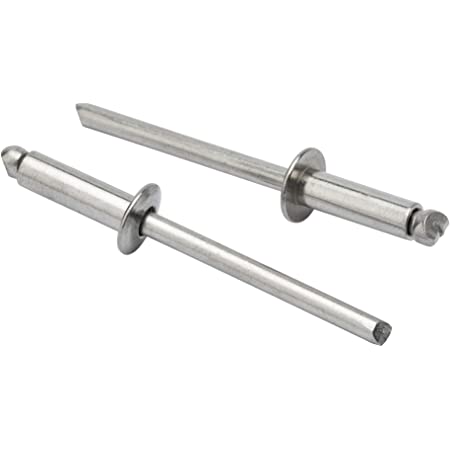
A number of Rooster customers ask the question what is the difference between Stainless Steel and Monel Metal ? - as used for example in rivets...
Though stainless steel is an extremely popular alloy such as A2 grade, the number one most popular marine grade is stainless steel A4 (316). All Rooster fixings we sell are A4 grade.
Adding molybdenum (2-3%) to the mix provides this extra cover – and gives the A4 grade. A4 grade then is also non magnetic and suitable for all the situations as A2, but has the added advantage of being suitable for marine solutions. Often called Marine Grade stainless steel. The molybdenum increases the corrosion resistance to withstand attack from many industrial chemicals and solvents and chlorides.
What is Monel?
Monel metal is commonly used in applications with highly corrosive conditions. This metal is typically much more expensive than stainless steel due to its strength and other monel steel properties.
What is Monel made of? — Monel is a group of nickel alloys, primarily composed of nickel and copper, as well as small amounts of iron, carbon, silicon, and manganese.
When was Monel discovered? — Monel was created by the International Nickel Company in 1901.
RS400 Wing Wangs – What’s under the bonnet?
It was time to change my Wing Wang Primary Lines on my RS400 and I had noticed that the wing wangs on my club boat were far easier than my race boat. There were three differences:
The blocks on the club boat were 40mm Harken and on the race boat, 29mm Harken.
The launch line on the club boat was under the Wing Wang Primaries. And the primary lines were much smoother than on the race boat. So I set about copying the club boat set up, made up a pair of primary lines that can be cow spliced onto the 40mm Harken Blocks, available from Rooster – if you are not keen on splicing. There was no need to change the Halitec RS400 Wing Wang control lines were the same on both boats and were far from worn out.
See the below video:
Gybing an RS400 - Update
Gybing an RS400
Gybing an RS400 can be trickier than some other dinghy classes due to its size, speed and the presence of wing-wangs (used to adjust the spinnaker pole angle).
This quick post summarizes our current method of heavy weather gybing along with a little video to demonstrate it.
1) Get the boat flat first! The crew loosely cleats the windward jib sheet before the maneuver begins.
2) The helm then uncleats the windward wing-wang and pulls the tiller toward themselves gently. The crew simultaneously moves weight into the boat whilst uncleating the leeward jib sheet.
3) At this stage the boom is beginning to travel across the boat. The helm begins to cross the deck and, en route, grabs the new wing wang with the mainsheet hand. The crew simultaneously begins pulling the spinnaker across (having the spinny sheets as short as possible can be useful here).
4) At this stage the boom has swung past the midpoint of the boat. The helm leaps out onto the toe straps and at the same time cleat the now windward wing-wang(tricky maneuver but mastered with practice). The crew also leaps out onto the toe straps and soon after begins adjustments to the jib and spinnaker. 5)The helm then swaps the tiller and sheet into the new hands. If the boat feel slightly overpowered here, the helm can simply steer the boat slightly back downwind to de-power it.
Overall this is quite tricky but practice makes perfect! Hopefully the video below will make everything clearer:
Aero Upgrade By Mark Riddington.
I have owned an Aero for 5 years, and in March 2021 decided to take advantage of the Boat Show to buy a new boat. Whilst setting up the new boat, I took a bunch of photos with the idea of documenting ideas on rigging and setup options.
The Aero is perfectly sailable as received from RS – simply follow the Rigging Manual (v6 at the point of writing) and your boat will be good to go. Everything you need to rig the boat is included, no need to buy additional parts, and all rope is helpfully labelled.
There are, however, rigging and set-up tweaks that you may choose to apply to your new (or existing) boat. The RS Aero class rules give some scope for modifications, the rules are updated from time to time so before embarking on any modifications/upgrades, it is worth reading the latest rules document to ensure that any modifications will comply.
As well as some rigging tweaks, I’ve included three boat checks that Aero owners (for new or old boats) may find helpful.
Note that the tweaks in the blog post are for the RS Aero with the 7 rig. Whilst the principles will be fine for the 5 and 9 rig, some of the dimensions will need to be refined.
1. Vang Upgrade: Additional block and tapered vang line
The vang is a principle control in any dinghy, the Aero is no exception. Anything that makes the vang easier to use is to be welcomed. The two modifications outlined here make the vang easier to adjust under load – the block on the gooseneck has less friction than the gooseneck pulley, and the dyneema of the tapered kicker is slippery through the blocks.
Note that some sailors in the front of the fleet don’t bother will these mods and adhere to the rigging manual. I can only assume they have stronger arms than me, maybe a few trips to the gym could be a viable alternative!
What kit is required?
Harken 2698 18mm FLY Carbo T2 Soft-Attach Block - Open Centre
RS Aero Tapered Kicker Control Line
What tools are required?
None.
Description
The class rules state the following:
“It is permitted to attach to the gooseneck a block of no more than 20mm diameter using rope tied around the vang gooseneck block (the attached block being no more 60mm from the gooseneck block) and to lead the vang rope through that attached block rather than the gooseneck block.”
The Harken block is ideal for this, and comes with a length of cord that can be used to secure the block to the gooseneck. The end result should look like this:
The Rooster tapered kicker comes with a pre-spliced loop, so it is simple to install on the boat – pass the loop through the becket on the harken block on the boom, and then pass the entire line through the loop. As you thread the kicker through the blocks, do be careful to avoid ‘crossover’ of the rope. You should be able to thread the kicker such that there are no ropes rubbing against each other. Once rigged, the tapered kicker looks like this:
Additional Notes
The Aero comes with a dyneema primary vang line, set up of this line is crucial to make sure that you have the maximum available travel on the secondary purchase. In short, when you set up the vang, you need the blocks to be touching, like this:
After you have used the vang in anger you will find that the loops on the mast and booms are bedding in and that the dyneema has stretched, and the primary line will have to be shortened to compensate. I left the vang on max for 20 minutes on my drive and then had to shorten the primary line by 10cm or so (that’s 4” for stateside brethren). Before shortening it looked like this:
You should expect to keep adjusting the primary line as you use the boat, the objective needs to be to keep maximum travel in the vang. I might be tempted to try ‘Rooster Zero’ to keep stretching to a minimum, but have yet to do so.
2. Easier Controls: Downhaul and Outhaul releases
Imagine the following scenario. You are using your new Aero in the Nationals for the first time, picked every shift on the first beat, and rounded the windward mark at the head of the fleet. It is a solid 25 knots, and you have been using max downhaul for the duration of the beat. As you approach the windward mark, you release the downhaul and outhaul, and just before the bear away you release some vang. A little windward heel and glorious bear away, photographers snapping away from a rib, a tear in the eye of the jury boat as they witness flawless execution.
A short way down the run you realise that the downhaul and outhaul are still on more than you would like – releasing the vang has allowed for more scope of release on the downhaul and outhaul. But you are right at the back of the boat, and don’t want to shift weight forward to adjust. In a light spot you decide to nip forward to release the controls further, but alas, a unforeseen gust hits the boat and you spin in a capsize to windward. The fleet sail by, making helpful remarks on capsize recovery (they are all trying not to smile, but inwardly, they are all smiling and looking forward to post- race analysis).
Downhaul and outhaul releases make it easier to release the control lines in a single action, rather than needing multiple passes as other controls are changed. So you can release before the windward mark, and be confident that you will not be readjusting on the next leg of the course. It is a relatively inexpensive upgrade that just makes the boat easier to sail.
What kit is required?
For the downhaul release:
1.5m of 6mm shock cord
1x spring hook
For the outhaul release:
2m of 6mm shock cord
2x Medium Inglefield clips
What tools are required?
None, but the following is useful (once you have used a hot knife for cutting rope you are unlikely to go back to a knife and lighter):
Hot knife kit
Also worth learning how to tie knots in shock cord, in particular the Zeppelin Bend
Description
For the downhaul release, you need to thread the spring hook onto the shockcord, and then create a loop of cord attached to the upper downhaul block. The Zeppelin Bend referenced above is a good knot to use to make the loop. You then make a loop in the halyard tail – this is the attachment point for the spring clip. Once installed, the system looks like this:
You can see the halyard loop and spring clip at the top of the picture, next to the ‘7’ on the mast, and loop of shock cord running down the mast to the downhaul double block. If required, you want to adjust the length of the loop such that there is a very slight tension when the downhaul is on maximum release.
The outhaul release is straight forward. Pass the 2m length of shock cord through the clew, and attach an Inglefield clip to each end using a simple stop knot. The shock cord gets taken either side of the boom mainsheet blocks to the first of the vang loops on the boom, and the Inglefield clips connected (on the right in the picture below).
Additional notes
There are many different ways to facilitate the release of downhaul and outhaul, this is just one example. I’ve used this set up for a couple of years with no issues, but have seen more elaborate systems on other boats.
I did try using 8mm shock cord for the downhaul release, but found that this made the downhaul too difficult to pull on – 6mm appears to the be good balance.
Minor point, if you make up your own system, be careful not to use a metal clip where it can abrade the carbon spars.
3. Easier Controls: Replacement of Downhaul double block
The aero comes rigged with a double block attached to the deck, to be used as the lower block in the downhaul cascade. The Aero Class Rules (specifically C.6.1.3(v)) allow for this block to be replaced by two single blocks.
The use of single blocks in the cascade reduces friction, and so makes the control easier to use. Worth noting that wear on the blocks is reduced as well.
What Kit is Required?
2x Harken 2698 18mm FLY Carbo T2 Soft-Attach Block - Open Centre
What tools are required?
None, but a needle fid can make it easier to fit the blocks
Description
This picture shows the double block to be replaced (centre), and the two singles to be installed (left).
The picture below shows the two single blocks installed. I’ve used some Rooster Zero (UHMPE/Spectra) to attach the blocks to the deck, but there is no reason not to use the cord that comes with the blocks (I did this to match the Dyneema of the other blocks, a completely unnecessary attention to detail that must have cost £’000s over the years!).
4. Easier controls – Easysplice for the downhaul and outhaul
The standard RS rigging pack comes with downhaul and outhaul lines that are already cut to length, each line has a small loop at both ends. Once the lines are threaded through the blocks, they are connected using a ‘lashing’ (see pages 19 and 15 in the rigging manual). Whilst I have no doubt that RS have tested the arrangement to the extreme, I personally prefer a splice to join the tails of the control lines, I find it runs through the small diameter blocks very easily, and I can never quite trust the ‘lashing’ approach!
Again, some sailors will be fine with the standard approach, but I note that a lot of sailors prefer the spliced rope solution.
What Kit is Required?
For the downhaul secondary control line: 8m of blue/white EasySplice
For the outhaul secondary control line: 5.5m of black/white EasySplice
What tools are required?
Splicing tools are required. You could do worse than buy the full kit, makes this type of job very easy.
Description
Follow the rigging manual, but instead of lashing the ends of the control lines, use a splice. For instructions already available on the Rooster blog
Other Small Stuff
5. ‘Main halyard primary’ upgrade
The Aero primary halyard is attached to the tail using a double sheet bend. This arrangement can be frustrating as the knot can catch in the eye at the top of the mast, making the sail more difficult to hoist and drop.
An easy solution is to make a primary halyard using EasySplice, with a loop that is attached to the tail using a bowline. This does not catch in the eye at the top of the mast, and makes hoisting and dropping just a little bit easier. You can buy one off the shelf from Rooster, including the plastic bobble.
6. Mainsheet upgrade
The standard mainsheet that comes with the Aero is 8mm Kingfisher ‘Braid on Braid’. It is a rope that is ‘soft’ and easy on the hands. The class rules allow for a mainsheet from any manufacturer, with a minimum diameter of 6mm and a maximum of 9mm.
A couple of seasons back, I tried a 6mm Polilite mainsheet for light winds, on the basis that there would be less friction through the blocks, and Polilite does not seem to form knots whilst lying in the bottom of the boat. After a few months trial, I now use 6mm Polilite as a mainsheet in all wind strengths – I do not have problems with sheet loading despite the relatively small diameter.
If a 6mm mainsheet seems a bit too small, there is a 7mm option that is already cut to size and even 8mm if you are happy to purchase by the meter. .
10m of 6mm Polilite mainsheet
10m of 7mm Polilite mainsheet:
7. JC Strap
A JC Strap helps the boom move to outward from the boat, especially useful when bearing away from close hauled to a run in light winds. It can interfere with the release of the downhaul, but not so much of a problem if you have an elastic downhaul release. Many classes use a JC strap, they just make the boat a little easier to sail.
My JC Strap is threaded through one of the vang loops on the boom, to a block attached to the eye on the bow of the boat (there is a double block in the photo as I subsequently moved the downhaul elastic to this block, a single block for the JC Strap is equally as good). I used 6mm shock cord which seems fine, and is the recommended diameter in the rigging manual. Remember to rig it outside the downhaull!
Parts required:
2x Medium Inglefield Clips
2m 6mm Shockcord
1x block of choice: HARKEN 224 22MM SINGLE MICRO BLOCK, or HARKEN 226 22MM DOUBLE MICRO BLOCK if you want the downhaul elastic and JC Strap in one block!
8. Deck Protection
Metal blocks seem to stain gelcoat – not sure why this happens, but it can make for an unsightly deck (which is triggering to those perfectionists among us). I’m not sure whether the blocks can actual damage the gelcoat, as I’ve always protected the deck. Easiest way to prevent the staining/damage is to use protective tape, cut to make appropriately sized patches. The photo shows tape below the blocks of the downhaul.
Parts required:
2m of clear chafe tape
9. Tape the Tiller Extension to the Tiller
This only takes a moment to do, but saves enormous embarrassment when the tiller extension decides to part from the tiller mid- race.
And finally, some checks for those fortunate enough to be buying a new Aero:
10. Check the fit between mast sections
The top and bottom mast should slot together with no gap between the sections. On my new boat, the sections were separated by about 2.5mm – no great distance, but this allows the sections to rotate, resulting in a potentially misaligned mast track.
The issue was the mast track on the bottom section – it was slightly overlapping the join. A couple of minutes with a file and the mast track was aligned to join, and the sections slotted together with no gap. So if you do have a gap have a close look at the mast track.
11. Check the screws on the hull fittings
There are a number of hull fittings attach to the deck using stainless screws. I checked all screws, the majority were fine, but three required tightening. I’m not sure that any of these would ultimately have caused an issue, but for the amount of time it takes, a systematic check seems like a good idea.
12. Check for burrs on the trolley axles
Very small point, but worth checking the holes for the lynchpins on the trolley. Mine had burrs that (i) prevented my trolley wheels from being removed, and (ii) but my finger! A few moments with a file sorts it out (but you would think the person drilling the hole could at least deburr it, and perhaps use a jig to get the holes aligned to the centre of the axle).
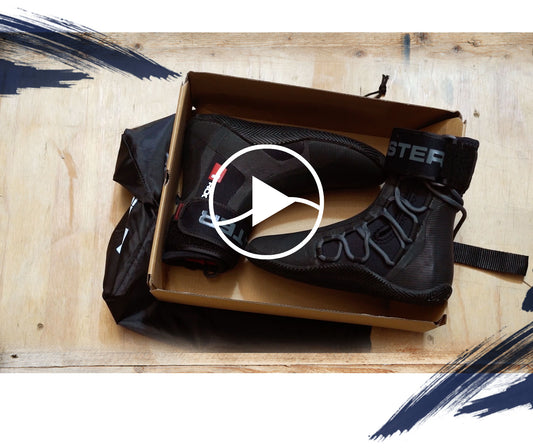
Pro-Lace Boots Unboxed Close-Up
The Pro Laced Boots (made from 4mm lined neoprene) have been developed to give the wearer ultimate support for hiking and trapezing. The wrap-around ribbed sole (also with 4mm lined neoprene inside) offers protection combined with superior grip, which blends over the top of the boot into a super grippy compound providing extra padding and hiking security where you need it most.
We have used a large gusset to allow for greater ease when putting them on and taking them off. There are strong adjustable laces to accommodate varying ankle and calf sizes and also allow for some freedom of movement at the ankle.
FEATURESEasiFit; made using proprietary 3D lasts giving a more stable platform and wider fit than the industry averageWrap-around ribbed, hard wearing solesWide neoprene gusset for ease of donningAdjustable lacesAdditional grip and support for hikingWill suit a wide variety of ankle size and foot widthWide removeable Velcro ankle strapCan be worn with Rooster Lace Tidy Boot Gaiters when ankle strap is removed.
RS Aero Over Deck Control Lines - Full Video
POST VIDEO NOTE:Please use a separate piece of line to attach the two blocks to the traveller eye. see image below:
This is to stop any chance of the two blocks and their 3mm elastic from tensioning the traveller in any way. This was required by measurement at the 2018 World Championships.
The story:
During the recent RS Aero World Championships, it became apparent that if I wanted to release the controls downwind efficiently that I would need to change the control lines to over deck take up style. The old style tended to get a little tangled downwind:
I was inspired by Steve Norbury’s version that I had seen at the Aero Southern Championships which I knew was class legal. Obviously, I have put some of my splicing experience into the kit to fasten the two Ronstan Shock Blocks in place and used Rooster’s EasySplice™ Continuous Control Line as it’s just so easy! I used the Ronstan Shock Blocks as they can be colour co-ordinated and are very light – which I guess is nice as the boat is so nice and light. I also used Selden 30mm Loop Top Blocks for the take ups in the video and have recently changed them to Allen 30mm Blocks .
Rooster has produced a kit with most of the splicing done, all you will have to do is ‘cow splice’ the Ronstan Shock Blocks onto a pre-made double loop 180mm line under the deck.
We suggest you use 2mm Spectwelve (an SK78 12 braided Dynema) for the take-up tidies and Rooster 4mm Zero a super low stretch UHMPE 12 braided line for the traveller. You will also notice that I have adopted the Rooster colours which have been used extensively in singlehanded sailing with blue for downhaul/ Cunningham, grey for outhaul and red for kicker or vang. Feel free to take the parts and ropes in the colours you are used to.
I used 5m of EasySplice™ for the outhaul system, although I did not have much line to spare so perhaps it’s worth taking 6m and losing a bit. Our kit is now 5.5m so you will need to first ensure your outhaul is maximum off.
Then join the outhaul when it can just go in front of the centreboard case with a little movement.
For the downhaul, I used 8m of EasySplice™, plus 1m of 2mm Spectwelve for the two side deck tidy’s and 1m of 4mm Zero for the traveller.
Tools:I like my tools so I tend to try and use them all. But if you are keen to do the whole thing yourself then you will need:
Serrated Scissors
2/3mm Pull Fid
4mm Push fid
Rooster EasySplice™ Needle Fid (I use the super thin needle for the EasySplice™ Control Line splice).
Needles and Waxed Whipping Twine (available on the Rooster website to finish off the joins in the control line.)
If you purchase the kit, then you will only need the EasySplice™ Needle Fid, twine and needle, although I am sure you would still find the Serrated Scissors useful.
Splicing TipWhen you cut the centre core out of easy splice, leave it as loose as possible. This will enable the other line to pass into it easier. Do not try and milk it to make it smaller as this will make it harder to pull the other end through it.
RS Sailing is the most forward-looking company I have ever been close to. I understand that they will be stocking these ‘Rooster’ upgrade kits in due course. I think it will make a significant difference to your Aero sailing enjoyment – if it could get any better!





 Select Store
 EU
EU
 US
US
