



 Select Store
 EU
EU
 US
US
Search results
46 results

RS400 Class - Rope lengths
Rooster now has complied a list of Rooster rope types and lengths recommended for the popular dinghy classes raced. For the RS400 they are:
RS400
Sheet: 7.5m of 8mm Polilite2:1 Halyard: 21m of 4mm Halitec
Sheet: 7.5m of 7mm PoliliteHalyard inc Rope Tail
Sheet: 11m of 6mm PoliliteHalyard: 17.5m of 4mm Spinfast
Please go to this Rooster RS400 dedicated webpage for more details and products.
Please note these items are classified as a CUSTOM PRODUCT and hence customers should be aware of the returns policy as found in the current Rooster Terms and Conditions.
Harmonised Rope Colours - Dream or Reality?
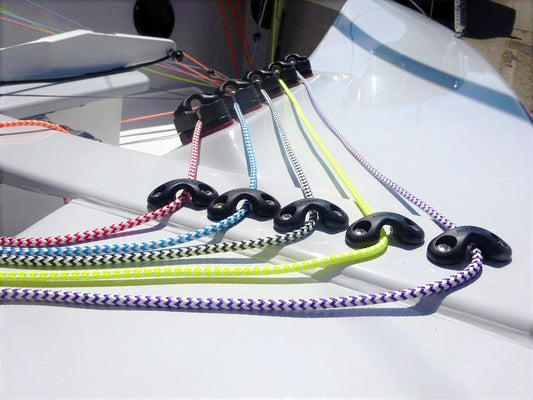
Standardisation of rope colours has been a hobby horse of mine for a very long time. I'm pretty sure it started when I used to swap boats with my mates to check out their rig or when stood on the shore, coaching. I would look down at perhaps 4 control lines and find that none were harmonised with the part of the boat they affected. Early on I standardised my control line colours and once I had the chance to influence what was available on the market, I made sure we offered Spectweleve™ Dyneema® and now Easysplice® for primary lines that matched my standard - Anything to help my tired brain when on the water!
My preference for the last 35 years:
Kicker or Vang: RED
Cunningham or downhaul: BLUE
Outhaul: GREY or BLACK
Spinnaker Halyard: FLURO YELLOW
For those of you with a traveller and inhaul control line, I'm yet to adopt a standard. So what are your preferences?Don't know which line to choose? Checkout our Blog and order online when you're sorted!

#BoatPrep101 - Part 3 Blocks Hardware and Rope
So far in the #BoatPrep101 series we have covered:
#BoatPrep101 - Part 1 - Trailing Safety, (Straps, ties, lighting boards, bearings, wheels etc) with some tips to speed up your boat up. Vital as my road trailer seized 3 miles from the sailing club!
#BoatPrep101 - Part 2 - Hull Prep, Cleaning and Repairs. So we had taken an old war weary Laser 4000 from this:
and by the end of the refurb it looked like this:
The process of taking an unloved boat, cleaning off the old pro grip, checking and replacing with Rooster Pro Grip, adding only the odd new parts was exciting. Boats like the Laser 4000 were built to last.
I did find that after taking off the spinnaker sock, that the chute was cracked and needed some remedial work to take the new style spinni chute.
With a dremel I was able to grid out the glass fibre part of the Chute opening and then add some epoxy and glass fibre. Just an evening job really. I also noticed that the inside of the Chute Opening had old screw holes that we were not planning to use, so I filled these:
You can also see that the spinni halyard has also cut into the gelcoat. We opted for some Chafe Tape to reduce the friction on this. Now you can see the chute with the black chafe tape attached:
Now with the new design of 4000spinni sock we have planned, we need to reduce the amount of possible snagging under the chute at the bow. So we opted to remove the P clips holding a spectra line across the bow of the boat. This line stops the spinni pole from dropping down as the kite is dropped. By using the same holes and two white small boggles we have now a much smoother and more effective pole control rope:
Here is the 4mm plastic boggle or rope stopper under the gunwale:
When I sailed the 4000 in the 90's, I loved 7mm Polilite® for the Spinni Sheet. It was light and tangle free and conformed to the class rules of an un-tapered spinni sheet. Once again I expect to use 6mm Polilite® on the Jib Sheet and 8mm on the mainsheet. I once tried a dynema spini halyard for the 4000 in the 90's. We got a tangle in the halyard that put us in the drink whilst being televised. I will not forget the embarrassment ever - but once we reverted to our spinfast halyard - we were never to suffer that ignominy again. Our control lines are pre cut. 4000 control lines are available here. There were many old blocks on the 4000 that were still serviceable and many that were not. New blocks and rope make the 4000 look like a modern boat. It certainly has earned its place as an icon of modern high performance dinghy design.
Surfy - pictured winning the 2015 4000 Italian Nationals

Chinese Rope Trick and 12 Braid Spicing
I love doing this trick. I love watching the faces of those I demonstrate this to as they smile and realise its really not so difficult at all.
Products used in this video: Rooster Micro Serrated Scissors - even better than the original. :) 2/3mm Pull Fid 2mm Spectwelve

Rooster's latest high-performance traveller for the laser/ILCA is again a breakthrough in rope technology.
Rooster's latest high-performance traveller for the laser/ILCA is again a breakthrough in rope technology....
RS800 Ropes by Rooster
Name
Length
Diameter
Type
Jib sheet strop
3.4m
4mm
Rooster Spectwelve (grey)
Jib sheet
4.5m
6mm
Rooster AllSpec Pro™
Spinnaker Sheet
12.7m
6mm
Rooster AllSpec Pro™
Standard mainsheet
7.25m
9mm
Rooster Polilite®
5:1 Mainsheet
10m
9mm
Rooster Polilite®
New rear sheeting mainsheet
12m
9mm
Rooster Polilite®
Mainsheet strops
2.5m
4mm
Rooster Spectwelve™
Boom strops (main)
0.7m
4mm
Rooster Spectwelve™
Boom strops (kicker)
0.9m
4mm
Rooster Spectwelve™
Continuous kicker
13.5m
4mm
Rooster EasySplice Continuos Control Line
Cunningham
13.5m
4mm
Rooster EasySplice Continuos Control Line
Cunningham tail
1m
4mm
Rooster Spectwelve™
Tramp ties
3.6m
4mm
Rooster Polyloc™
Toe Strap Ties
0.8m
5mm
Rooster Polyloc™
Wing pin ties
0.3m
3mm
Shockcord
Jib fast pin ties
0.25m
3mm
Shockcord
Main/Spin halyard take up
1.8m
5mm
Shockcord
Trapeze front
5m
5mm
Shockcord
Trapeze back
6m
5mm
Shockcord
Control line take away
3.8m
5mm
Shockcord
Take away block tie
0.3m
3mm
Rooster Spectwelve
Spinnaker sock tie
0.3m
5mm
Shockcord
Daggerboard Retainer
0.7m
5mm
Shockcord
Control line ties
0.2m
3mm
Rooster AllSpec Pro™
Bowsprit launch line
3.2m
4mm
Rooster Spectwelve™
Bowsprit / Spinnaker tack line
6m
4mm
Rooster Spectwelve™
Spinnaker halyard
21.5m
5mm
Rooster Spinfast
Jib halyard
15m
4mm
Rooster Halitec™
Main Halyard
21.5m
4mm
Rooster Halitec™
Trapeze adjuster
1.6m
5mm
Rooster Polyloc™

Polilite®
Rooster's lucky break. In 1998 I gave Robert Scheidt (current world number one in the then laser class) a Polilite® 7mm mainsheet to test. He loved it but requested a lighter weight version for the expected light winds that Sydney would give. We then developed the 6mm version for him and Ben Ainslie. Polilite® went onto win all three medals at the 2000 Olympics. 6mm, 6mm, 7mm took the three spots on the podium then and has made it there many times since 2000. -Steve Cockerill (Rooster Founder & Chairman)
The History of Polilite®
They say that necessity is the mother of invention. In my case, I had been so upset by the way the mainsheets behaved on my Laser during the 1992-1996 Olympic cycle that I was keen to finally solve it. The concept was to produce a rope that was closer to 7mm than 6mm to help reduce the tangles and make it a little easier on the hands. I also wanted it to be lighter than a normal 6mm polyester rope and primarily, I wanted it to run out easily.
I figured that it was the properties of the inner core that made the rope more likely to tangle. His idea to solve the problem was considered by the rope manufacturer to be more revolutionary than evolutionary. I had the idea to put a low tech high stretch rope as the inner core of the rope. This would make the core lighter and leave the outer core to be the load bearer. The outer core would therefore also pinch the inner core under load - which would help maintain stability. I named it it Polilite® as it's a light weight polyester sheet.
Wash & Care Instructions
Wash before use:
Wash the Polilite® mainsheet in a washing machine on a cold cycle with a small amount of powder detergent.
This removes manufacturing oils that make the rope initially slippery but were used to increase body and reduce kinks.
Handling and coiling:
Always treat the rope with care.
Coil it climbing rope-style to prevent kinks and twists.
Alternate between left twist and right twist when coiling to maintain rope stability and protect the core.
Inspection and replacement:
Regularly check the outer core for wear, as it bears the load.
Replace the rope after 1 year of weekend use.
Rigging instructions:
Before rigging, ensure all coils and kinks are removed from the rope.
Once dead-ended in the boat, the rope won’t create or absorb kinks.
A good tip: throw the rope across the boat park and pull out twists before rigging.

A 60 Second Trick That Might Save Your Bacon!
After experiencing some crazy winds at the weekend, I realised that it was time to change my rudder pull down rope.
Not because the rope is too stretchy, but because it has no stretch at all. The downhaul rope had not cleated properly as I left the shore. I was aware that the rudder had moved up during the first beat which was quite an encouragement to keep the boat especially flat, but did make it hard to handle in the extreme conditions. You should have seen me trying to pull the rudder down and re cleat it in 25-30 knots on the run! Not really ideal, especially in the crazy destruction derby course we had at the Datchet Flyer.Most tillers use a valley cleat; Clamcleat is probably the best known. These cleats require the tensioned rope to release slightly to take the rope into the valley of the cleat. If you use a very low stretch rope, then you have no tension left in the line and the rudder lifts as it cleats.
It is then that you realise the importance of some stretchy 8 plait pre-stretch. It cleats and the tension in the rope remains. I have changed both the primary, the line that runs from the blade to the pully and the cleating secondary with some 4mm Spinfast. It cleats easily and holds tension in the line. I have also splashed out and added a Racing Junior Clamcleat with Becket (a nice little notch to anchor the 2:1 pull down line).
Note: How the rope runs over the top of the tiller from right to left of the tiller to give you more length/purchase power.

Can you taper Polilite?
Despite using Polilite® in its many diameters for many years, I am embarrassed to say that I have only just realised that you can taper Polilite®.
Basically, you can take the centre core out of the rope (pulling it from an end) leaving the strong outer core to do your work. You will not be able to pick out the core midway down the line as its 32 plat Polyester outer core is super tight. This means that you have to be sure how far to take out the core. You will only get one chance to pull the core and cut the length you want to taper once. When you have milked the outer core back over the rope, there is no going back. If you want to be super neat, you could grade the taper by taking out one plat of the core at a time over a couple of inches. Once tapered, you will find it much easier to sew and whip a loop into an end. I now am a proud owner of a continuous jib sheet (so no more annoying knotty tangles around the crew's feet ) and I now have a neat Dynema soft shackle to join the ends of the jib sheets to my jib cringle. I used a needle and whipping twine to sew through the tapered Polilite to make the loop. In my first stab, the picture on the boat, I did a stitch, then a wrap along the join. This was my way of making me feel confident that it was strong enough for the job, even if it looked a little suspect. I have since done another more tidy version with some pictures below. The inspiration for trying out the 7mm Polilite taper was my wife, Sarah. She insisted that despite all the high tech rope we have at Rooster - she just loves Polilite, she loves the feel in her hands and positivity of un-cleating. I guess she knows quality when she sees it, as Polilite® has won more Laser World Championships than any other rope. OK - so now I am feeling slightly bad about my quick and dirty whipp - so I have done it and improved it somewhat. Take your 7.5m of 7mm Polilite Cut the ends of the rope off to reveal the white inner core Pull out the inner core to the length you want to taper Using a 3mm fid - after thinning the excess outer core (trim and tape) you should be able to use the Rooster Rope Tape to push the rope through the core once. This part of the process just made me feel that I had created a slightly stronger loop. I am not really sure that it is needed, so if you do not have a 4mm push fid and some Rooster Tape for Rope, just do a few more stitches in the loop. Using doubled whipping twine, sew using your palm and perhaps even a pair of pliers to help pull the needle through. Making a nice flat stitched join. Then continue to wrap the twine back to where you started - -using lots of tension. Once at the top, finish off with a captive stitch. Then take that stitch back to the bottom of the twine wrap. This will hold the wrap in one place. Take that stitch back to the top again and burn off the end of the twine. Job done.

Top 10 Topper Tips
Hello! As you may have gathered from the title, I'm going to share with you the many boat-prep tips and tricks which I've picked up during my time in the Topper National Squad.
I do not claim ownership over these; the nature of the class is to help everyone and so many people helped me, so now it's my turn.
Tip no.1: You can make yourself an emergency bailer in case yours breaks in a race. It is very simple and you don’t need to be a technical whizz (I asked my school’s DT department to use the laser cutter) :-D
Get two bits of plastic (any kind, it really doesn’t matter) 13cm by 5.5cm
Put a couple of holes in them
Then pop some elastic through and thread on a bobble
You can then insert this into the bailer hole if it breaks and tighten the elastic – no water will come in!
Tip no.2: Last year, my UJ (the bendy bit which attaches the tiller to the extension) broke. Afterwards, I was advised to use a RWO R0842 Race Omniflex Joint With Rope Core which has a piece of rope running through the middle, which means that even if the plastic breaks then there is still the rope keeping the tiller and extension together.
A few of my friends have broken theirs as well and honestly, it’s worth it for the sake of £15 because you would definitely lose a race or an afternoon sailing if it goes as it’s very hard to sail without a tiller extension – trust me, I’ve tried!
Tip no.3: Take off the extra piece of rope at the top of your downhaul, and then thread the blocks with 2 metres of rope - either the Rooster Spliceable Dyneema or the Rooster Control Spliceable Polyester Control Line - I suggest the 4mm Rooster SDC rope. This allows you to pull more on.
Tip no.4: Use a Rooster Topper Adjustable Toestrap. Honestly, this is a game changer. I feel that the need to adjust your toe-strap is not really stressed enough in Toppers, while in Lasers it’s hammered home. If you have a tight toe-strap downwind it makes it much easier to save death rolls, and a loose toe-strap upwind gives you that extra bit of leverage.
Tip no.5: Have you ever experienced it when you’re approaching the windward mark and yanking your kicker off with all your might, but it just won’t release? Then it may be worth adjusting the angle of your bottom kicker block cleat up one or two notches. When you buy them they’re too low, which makes it easy to pull on kicker but a nightmare to pull off, and also wears the rope away quickly. I would definitely advise playing around with the angle a bit in training and finding what works for you.
This is how to do it:
Unscrew the screw (make sure you don’t lose the bolt!)
Twist the circular bit up so the ball bearings realign
Re-screw it
Here is a picture of my kicker and the angle I found worked best:
Tip no.6: The standard plastic traveller fairleads break very quickly and this can be really annoying. Therefore, I found that using the ALLEN A.282A ALUMINIUM FAIRLEAD was much better and hardly showed any signs of wear after a year’s use. Don’t worry, I passed measurement at both the Worlds and Nationals last year with these – they are completely legal so why not use them?!
Tip no7: Back. Up. Everything. Literally, Toppers break a lot because they were never meant to be raced – I mean, just look at the shape of the bow…
I would say the most important back up is the mast webbing strap because as soon as they start to wear, they go – even if you check them in the morning, they could start to wear in race one and break in race two. If you purchase a Sailing Solutions Mast Webbing Kit then it already comes with a back up piece of Dyneema. Also, I would recommend using the Sailing Solutions one over the standard Topper one because they are definitely stronger.
Tip no.8: In addition to the previous back up, I would suggest putting a back up on for the metal ring as well (in case the rivet comes out). To do this, just tie a piece of Dyneema or Rooster Spectwelve rope to the metal ring and tie the other end to the mast (below where it goes into the mast gate). This needs to be tight enough to ensure the ring does not end up halfway up the mast if it breaks, but loose enough to allow the mast to rotate.
When rigging your boat, make sure that this rope goes OUTSIDE the mast gate (otherwise it wears away really quickly and prevents mast rotation).
Tip no.9: The Rooster Sailing Solutions Boom Webbing Kit comes with a back up for the boom’s webbing strap (as shown below):
Tip no.10: You should undo the webbing every three months or so to check for any wear underneath. This part of the boom is a weak point because there is a hole for the rivet. Maybe ask my fellow Topper Sailor Jake Bowhay about this one as he has bent many a boom…
Thank you for reading this and I hope you have found it useful. Keep your eyes out because I will be posting another blog, with more tips, soon!
Frances Fox

New 2000 Shake Down and Sort
After picking up a new 2000 from RS sailing, I spent a day preparing the boat for the first event at Weir Wood.
I changed the toe straps for Rooster 2000 Helm and Rooster 2000 Crew versions - the RS ones were nice, but not quite as grippy for serious hiking. See related fitting article.
The spreaders, however, did give me a bit of a challenge. The current specification for the 2000 mast uses Selden's integer adjustment system which is, in effect, a series of holes to pin. Sadly, it foxed me for the first day and I managed, with a good deal of fiddling, to get to somewhere near 175mm - and that after compromising on the length of the spreader. I reduced the length a bit to prevent it being more like 180mm. I set up the rake as per the tuning guide at 6560mm and we went sailing. The mast foot tends to be placed as far back but one hole as possible. I think the most aft hole has a take off from the vang. Anyone with something different or faster - please let me know.
Sarah really struggled to get the spini up and down in the first race. We noticed that the pole pull out rope had stretched and the block was now infringing with the turning block on the deck causing some friction. The block on the deck was close to exploding. I also noticed that the end of the rope secured to the pole was also starting to fray already. The hole in the pole as supplied was great at cutting the rope with its nice sharp edge. So I shortened the fraying end and we were back in business.
3 races later, the rope broke and we needed to tie it up again - lucky for us this was after the race had finished.
We were also struggling to pull the kite all the way into the chute. In fact, we sailed around with a 6" triangular piece of spinni marked 'head' over the bottom 6" of jib which was rather distracting upwind. We could not work this out. Despite reducing the length of bowline we tied onto the top patch (a longish bowline normally allows the patches to go into the chute separately and reduces the load pulling the kite into the boat), this helped a little, but we were still foxed as to why we could not pull the kite down properly. We were at a loss until a kind fellow sailor advised that it was the knot inside the pole that had been tied too short. This is the knot that helps pull the pole in when you pull the kite down. As the tack and head of the spinni are linked (they both come in the chute last) then the lack of slack offered by this knot in the pole had stopped us pulling the tack and head of the kite into the boat. Phew - that saved one sailing marriage. A little bit of boat work after the first day was required to tie a mouse line to the pole tack line so I could feed it down the pole from the outer end to allow me to get at the knot from the inner end of the pole. Knot duly moved, we could now get the kite down. Smiles all round.
I re-checked the rig tension again the next morning. Wow - new masts and boats settle in a lot. We were now down a third in rig tension. I did not get a chance to check the spreaders as race time was approaching. As the wind had come up somewhat for the second day of racing - more like 12 knots average - I gave the mast one half a pin of extra rake. I understand that relates to about 25mm extra rake with the same rig tension. By the way - 2000's measure the rig tension on the shrouds.
We were super competitive upwind and sadly super slow downwind. Our main looked very flat. Perhaps the spreaders and our rake? I had to use mainsheet tension to hold our leach for power - so it was hard work on the arms.
Sarah still had issues getting the kite up and down but the racing was frenetic and fantastic.
Today, in the warmth of the spring sunshine, I was able to re check the spreaders. Wow - they had moved nearer to 180mm from 175mm. So a little bit of settling in there too!
I was also finally able to get 165mm on the spreader deflection and the 480mm on the spreader length. I took lots of pictures as it was a fiddle to find the right hole to get to the setup. I hope you find this useful. Instead of using the more stable spreader hole, I use the one that could give you more angle, but this gave me other options for pinning on the inside of the spreader.
Finally found 165mm deflection.
480mm on the spreader length.
I also found why we still had spinnaker hoisting and lowering issues long after sorting the knot in the pole and the pole launch rope. I took the heel plug off the mast to find that the spinnaker halyard was twisted around both the main and jib halyard inside the mast. That explains the pain and grief over the weekend. We also found our halyard hard to spot in the boat. It was black in colour which blended into the rest of the ropes in the boat. Rooster have made our own 'spinfast' 4mm 8 plait rope that is lime in colour. It's easy to spot which is helpful when, for some unknown reason, it has decided to take a twist round the jib fairlead :) It is also smooth enough to run nicely without snagging, yet grippy enough to tug on. We like to put a dark pen mark on the halyard as it comes though the cleat when the kite is fully up. It tends to help over excited crews from pulling for ever as they see the marker and can stop. I know there are sailors who love the idea of a dynema® halyard. From experience, I have lost a 4000 Euro Cup in its hay day by having a twist in a dynema rope that snagged when pulling it down. 8 plait ropes absorb nasty twists that a polyester covered dynema can't. Rooster's new Spinfast is specially snag free.
Changing the spinni halyard for Spinfast.
I tackled the spinni halyard exit hole in the mast and the inner pole end hole for the pole launcher that needed de burring.
I used a great tool that makes this process easy. I borrowed it from Rooster's own mast rigger and finisher. It is called a de burring tool. You can get them from RS components or Amazon. Just purchased my own so I can deburr yours if you like.
Then I replaced the pole launch rope with some Rooster Spectwelve rope. A super low creep, low stretch solid dynema®. Let's see how hard wearing it is, at least once I have it set up - it should not stretch.
I am going to change the Crew's Selden cleats to some Harken 150's. These roller bearing aluminium cleats last for over 20 years use in my experience. They let ropes in with little effort and out with a flick. They are just the best. Mrs C will be pleased with these after experiencing how tough trimming the 2000 jib was at the weekend.
The fleet were very open to talk about their rig set up. Notably, Fergus is a credit to the class; he is both a great sailor on the water and helpful and amenable off the water. Fergus told me that they all compromise upwind performance for downwind performance. Some even set their rigs up even further forward than the standard tuning guide, perhaps as much as 6580mm from the top of the main halyard in the up position to the top of the plastic on the top rudder gudgeon where it kisses the hull. After sailing around 6535mm before the shake down each day, we were quick upwind but super slow downwind. I had to use mainsheet tension upwind as the main was very flat and open. I am looking forward to testing the spreaders now at 165mm rather than 180mm deflection which should stiffen up the mast fore and aft. I imagine I will now be able to use the vang a little more. I have also finally got the spreaders out to 480mm in length. I was at about 475mm as I was concerned at adding more pre bend. This should now help stop the mast bending sideways downwind and help hold its depth. I am prepared, if the sail looks a little hooked upwind in lighter winds, to reduce the rig tension and let the mast bend of its own volition. I am not sure if the fleet allow us yet to adjust the rig tension during the race. I need to read some rules.
Still to do: Centreboard break adjustment. This needs adjusting whilst on the water. Our centreboard just comes straight up at the moment, so it was a good job we had the elastic to hold it down. Apparently you pull the board up lots for downwind until you are planing hard. Its not for balance, but reduces drag. I just need to remember to take a long screwdriver on the water this weekend.
We are certainly looking forward to seeing the 2:1 jib sheets to be adopted. I always call the jib my coarse power control and my mainsail, the fine power control. So my crews have to work hard in strong winds to keep the boat on its feet by letting the jib sheet out in the gusts. The helm has to not steer to this new eased jib, but keep feathering as the gust is allowed to pass the slot before re trimming the jib. See also this blog article.
I hope to see you on the water again soon. Please add your comments below if you can add anything to this article. From my short experience, the 2000 fleet are probably the most friendly, affable and best cake baking bunch I have ever come across and with some excellent racing to boot.

Steve's Start of Season Checklist
Here is my checklist for when the season starts and I lift the cover off the boat - usually too late!
Toestraps
I check my toestraps for signs of wear, the toestrap fixings and rope attachments.
Spars
Look over your rivets and fittings for any signs of wear. If there are any wobbly fittings then it's time to change the rivet. You might also like to check the related blog on helpful hints on Riveting. Don't forget to use some Duralac to help stop the corrosion that occurs between dissimilar metals and please use a 4.8mm drill bit not a 5mm drill bit. We stock a wide range of Holt, Allen, Ronstan, Superspars and Selden spars and fittings. Check your shrouds and halyards for signs of wear and make sure your halyard tails are remade so you don't loose your jib halyard on your first hoist. If you have a rope halyard - I can't recommend Halitec enough if you want a non stretch, durable 4mm easy cleat halyard. If you use a 2:1 halyard, you might like to check that the termination at the top of the mast is smooth with no sharp edges and move your knot ready for the season. We tend to supply Halitec main halyards that are very generous, so you can move the wear position throughout the season - just to be sure.
Sails
Simple tears in the body of your sails can be repaired with sail or spinnaker repair tape, but for bolt rope issues and tears in your loaded areas, you will need to take it to your local sailmaker.
Rope
You might like to wash your ropes to rejuvenate them, but if you are using Polilite® sheets, remember that the outer braid is the load bearer, so changing them annually on high wear sheets is recommended. If your sheets are not running well, you should ensure that the blocks that they run through are at least 4 times the diameter of the rope. Check over your primary load lines. You might like to get some top tips on how to do some splicing - check out our how to video tips on this. Control lines that have gone flat and are showing signs of wear can either be end for ended to improve their longevity, or changed. If you are keen to do some continuous control lines, we have the video so you know the secrets.
Blocks
If they are not working too well, they might just need some soapy water and some lubrication to get them working as good as new, but if they are looking dodgy and need changing, we can help.
Cleats
Even after some lubrication you might have some issues with your cleat holding lines. They might be over tightened or the return spring may need adjusting. If your jaws are worn flat, a needle file can put the bite back into them, or you might just need to replace them.
Trailers
An annual check and service is advisable and we have entire blog post dedicated to the job.
Hull
Check over the outside for any nicks that can be easily repaired with your gelcoat/catalyst mix. You should be able to get your colour from the boat manufacturer. The best polishing compound to bring up the finish after you have used wet and dry paper is Farcela, followed by an environmentally friendly hull polish.
Foils
The finish on these is much more important than the hull. Check out our blog on an epoxy foil repair. When you have finished your A1 job, don't forget to wrap them up in a decent Foil Bag when travelling.
Rudder Stock and Tiller
Your tiller extension joint is likely to be perished - I think we stock every type at Rooster! I tend not to use the rope cored versions as I don't have faith in them. Once they have see through rubber, my feeling is that the UV degrades the rubber quicker. I recently changed my RWO black standard joint on my tiller extension that I put on before the 1995 Olympic trials - it was starting to look perished! If you are confused about how to attach your joint to your tiller, our video should help. Rooster Carbon Tiller extensions make changing the joint a 3 minute job and are a bullet proof option - but we also stock aluminium ones as well if you prefer. Your rudder stock is a vital piece of equipment. I tend to check it for corrosion or cracking. We stock a wide range of rudder accessories from wing nuts, gudgeons and pintles for both the boat and your stock.
Feel free to comment below with your boat prep successes and failures!
Happy Preparation, Steve
Save

Getting ready at the local sailing club for the start of the 2020 spring season
Getting ready at the local Sailing Club for the start of the 2020 spring season with Rooster Race Marks
The annual RYA Dinghy Show marks the start of the Dinghy Spring Season for the UK. At my local sailing club - Dell Quay SC, the first event of the new 2020 season is the ‘Breakfast Breeze’ race on the 7th March 2020. In readiness for the new season, the club purchased during the 2019 winter a number of new Rooster Inflatable marks. This allows our Race Officers of the day, the option of setting a better club race course (and not using fixed marks) to suit the prevailing wind and tide conditions. The new Rooster marks are available in a variety of sizes and colours to suit the requirements of most clubs. The smallest mark Rooster stock is the budget busting Racing Mark 'Pin' 30cm x 130cm a (30 diameter x 130cm height mark) ideal as a start line pin end mark, or as a light weight, easy to handle coaching mark for the impromptu on the water coaching sessions. (The mark is available in blue, black, orange or yellow colours). Next model in the range, is the Racing Mark 'Dumpy' 100cm x 76cm a 76 diameter x100 cm tall inflatable mark available in black, orange or yellow colours. This mark is ideal for short leg club courses, and again easy to handle for the patrol boat crews when deploying. Next up, in the Racing Mark 'Tall' 153cm x 61cm – a popular choice for typical club racing with the benefit of a 1.53m height, so it can be seen at distance for race competitors - and the Race Officer – available in black or yellow. And finally, the for your Open, National or Intentional events, Rooster can supply the Racing Mark 'Giant' 183cm x 76cm a 183 high x 76cm diameter mark - available in black or yellow. Each mark is made from 32oz PVC Polyester fabric and has attachment 'D rings' made from stainless steel. See below Figure 1
Figure 1
Setting up a typical Rooster 'Tall' Race mark for deployment
Now, once you have purchased your race mark, you will need to create a simple rope ‘harness’ to attach a small sinker weight (approx. 10-15Kg) of your choice, to help the mark stay upright when deployed in the water. Each rope was approx. 1.5m (2 no. required) and was simply spliced to each of the 'D' rings (4 no.) How to splice a 3 strand rope ? - see HERE
Our club made a simple rope harness using 10mm diameter 3 plat rope, spliced to the mark 'D rings' as show in Figure 2.
Figure 2
Next, using a large plastic plant pot (or bucket) as a mould, (The pot we used was approx. 300mm high x 250mm) we then made a suitable small counter balance weight from concrete (using a bag of pre mixed fence post 'fast cure' concrete is ideal) and using a small length (1.8m) of galvanised chain, passed the chain through the plastic pot mould, and out the bottom, and then filled with the wet concrete mix and allowed it to set for at least 12 hours. When the mould was removed, (we cut it off with a sharp knife) it look like this as in Figure 3 Figure 3
We than attached (using a stainless steel 'lock carbine hook') a suitable rope anchor to the large shackle to complete the job. You will also need a foot pump to inflate the mark, the Rooster Mark Foot Pump is ideal, as it has a suitable bayonet fitting used to attach it to the top of the mark valve. If you have any further questions or need advise on your race mark requirements, do not hesitate to contact our Customer service team at Rooster Sailing. - And don't forget, if case of 'accidents' the Rooster Mark Repair Kit

How to - Make a Soft Shackle with a Dog Bone
With a 6 or 7 Dogbone you can quickly create some super smart soft shackles that are safe, secure and very easy to undo when required.
In this case I had planned to use a Harken 18mm T2 Soft AttachBlock for the clew of my outhaul. It is a very light and strong block and has an open centre which makes this all possible.
What you need:
40cm of 2mm Spectwelve
1 x 6 or 7 DogBone
Harken 18mm T2 Soft Attach Block
Rooster Easysplice needle fid/ or 2/3 pull fid (the cheaper option)
3mm push fid
Rooster Serrated Scissors or a very sharp knife
15 mins of your time
My aim was to make a line with one small loop at one end and a securely attached DogBone at the other about 120mm long (bearing to bearing surface. This appears to work well around most sail clews.
You would think that I can't use much more than 240mm of line to do this - and you would be right (well nearly) as the rope gets a little shorter when it is filled and working with the exact length is very tricky as you have no spare to pull or work. So I start with about 40mm.
Make a loop about the size of your finger tip - this loop should be just smaller than the length of the dog bone so it is super secure when you have threaded the Dog Bone through. Ensuring that you have about 60mm of spare to tuck in.
Then complete the Brummell by taking the long end through the short end.
Then tuck the tail into the outer core. I used my Easy Splice Needle fid here but you could just as easily used a 2/3mm push fid.
Milk the outer back and you have a nice loop.
Now work out where you are going to attach your Dog Bone.
In this case I want the DongBone to have a finished length of 120mm - but remember that the leash will get smaller as you start to tuck the tails into the outer. So I start at about 125mm.
Using the 4mm push fid - take the tail through the rope and pull it tight.Then to complete the Brummell around the Dogbone - you will again need the 4mm push fid to thread the loop end (tail) through the end. In this instance our tail is the loop.
Pulled through - it looks like this:
Now you just have to tuck the tail back down the line - there is not much room now and you will have to come out of the rope at the same point as your loop end tuck finishes. For this I used my EasySplice Needle Fid.
Once finished you will be wasting a little piece of rope.
Now you can thread your DogBone Leash through your 18mm Harken T2 Block
Job done. Time to tell your friends just how hard that was so you look like a god of splicing.
The article with video linked below might help remind you how a simple 12 braid splicing is done.

And Yet More Topper Tips!
Hello! Following on from my last top ten tips from my time in the Topper National Squad, these are the next ten!
Tip no.11: Topper introduced a new style sail with a webbing strap to stop the sail slipping down the top of the mast as the halyard loop stretches. However, these straps have a tendency to break – which is far worse. So I stuck to the more reliable halyard loop. The only new sails now available are those with the webbing strap but you can still use these with a halyard loop by just pushing the webbing out of the way:
Don’t worry if you only have a new style mast crane for use with the new sails: there are two options:
Change the masthead fitting to the traditional mast crane and use a halyard loop.
Or
Put a halyard loop in one of the jaws of the new mast tops and secure the bobble through the eye of the sail, so that if the strap breaks your sail will stay in place:
Tip no.12: Ah, the long-debated question of where to put your tell tails. After talking to lots of coaches and top sailors, I have figured out where most people put them. The tendency is to have two or three at the front in a triangle (to be used upwind), one in the lower middle section (to be used on a reach) and a few near the leech at the top of the sail (to be used downwind, to see if you are sailing by the lee).
This is where I put mine:
Tip no.13: This is very simple but I cannot stress it enough…HAVE A SPARE KICKER ON YOUR BOAT! Even with the best rope and blocks in the world, Topper kickers have a tendency to break, and I certainly had more than my fair share of this last year! - I seem to remember going through three sets of kicker rope at Garda…If your kicker breaks in a race then it’s basically game over if you have not got a spare, but if you do then you could get away with only losing a few places.
If your kicker rope is breaking a lot then a good thing to regularly check is whether there are any chips on the teeth or surfaces of your blocks: the rope can snag on these, wear and break. A spare kicker can also act as a back up downhaul.
An easy way to store the spare is in a Sailing Solutions toe strap bag. They are easy to open and access mid race.
Tip no.14: Mast rotation is important and there are various ways of improving things. I used chafe tape:
Measure round the mast (16.5 cms) and cut a piece of chafe tape twice the circumference plus 0.5 cm 33.5 cms).
Fold the strip in two and stick the two sticky sides together with a 0.5 cm overlap.
Put this round the mast (where the mast gate touches it) like a collar and use the 0.5 cm overlap to stick to itself. Make sure the tape doesn’t stick to the mast – it must be free to rotate.
It has the added bonus of filling in the gap between the mast gate and mast to reduce mast wobble.
Tip no. 15: The rivet on the collar on the lower mast, that fits below the mast cup, can fail. As a back up I put rope round the mast just below the ring and wrapped amalgamating tape round to keep it in position.
Tip no.16: Always put electrical tape around the joint between your tiller and tiller extension because if you jab the tiller with a little too much oomph then the extension can come off! Admittedly, this is rare but it’s better to be safe not sorry (and probably teased remorselessly!).
Tip no.17: In order to prevent the mast cup wearing away, put a Teflon disc in. They are very inexpensive and work really well. Do look under the disc every so often as dirt and gravel can get stuck under them, which will cause more damage than not using a disc at all. I also stuck anti chafe tape round the bottom of the mast to help rotation and protect it from wear.
Alternatively, arm yourself with a heat gun and a 500 ml plastic bottle.
Cut the bottom 7cms off the bottle, cut a hole in the base of the bottle (important!) and slide it onto the bottom of the mast.
Carefully and gently heat the bottle: it’s like magic as the plastic shrinks to fit the mast.
The tricky bit can be the bottom of the bottle (particularly if you forgot to cut a hole there…) as this can bubble and warp when you want a lovely smooth base (so it doesn’t to eat into your mast cup). To achieve this use a straight edge and slide it across the bottom of the bottle as you heat it.
Some suggest using a hairdryer but I have never found one hot enough to work.
Tip no.18: Do you ever get in a fluster when your mainsheet seems to have a mind of its own, ties itself into knots and wraps itself around your ankles? A good tip is to tie the end of your mainsheet to either the front or back of your centre toestrap: this is personal preference so try out both positions when training and see which works best for you.
Tip no.19: It seems to be seen as ‘uncool’ in the fleet to use a transom protector, but my advice is to get one and use it. Particularly in difficult launching conditions, eg. pebbles, steep slipways…because the transom is a real pain to repair as it’s a corner. You’ll be the cool one when your friends have big chips in their transoms – you’ll also be popular with mum and dad when it comes to resale value!
Tip no.20: Use lubricant spray on the end of the boom (to help the clew strap slide), the top of the lower mast (to help the sail slide as you change control settings) and blocks. It’s all about the marginal gains!
Thank you for reading! I hope you found this useful.
Save Save

Aero Upgrade By Mark Riddington.
I have owned an Aero for 5 years, and in March 2021 decided to take advantage of the Boat Show to buy a new boat. Whilst setting up the new boat, I took a bunch of photos with the idea of documenting ideas on rigging and setup options.
The Aero is perfectly sailable as received from RS – simply follow the Rigging Manual (v6 at the point of writing) and your boat will be good to go. Everything you need to rig the boat is included, no need to buy additional parts, and all rope is helpfully labelled.
There are, however, rigging and set-up tweaks that you may choose to apply to your new (or existing) boat. The RS Aero class rules give some scope for modifications, the rules are updated from time to time so before embarking on any modifications/upgrades, it is worth reading the latest rules document to ensure that any modifications will comply.
As well as some rigging tweaks, I’ve included three boat checks that Aero owners (for new or old boats) may find helpful.
Note that the tweaks in the blog post are for the RS Aero with the 7 rig. Whilst the principles will be fine for the 5 and 9 rig, some of the dimensions will need to be refined.
1. Vang Upgrade: Additional block and tapered vang line
The vang is a principle control in any dinghy, the Aero is no exception. Anything that makes the vang easier to use is to be welcomed. The two modifications outlined here make the vang easier to adjust under load – the block on the gooseneck has less friction than the gooseneck pulley, and the dyneema of the tapered kicker is slippery through the blocks.
Note that some sailors in the front of the fleet don’t bother will these mods and adhere to the rigging manual. I can only assume they have stronger arms than me, maybe a few trips to the gym could be a viable alternative!
What kit is required?
Harken 2698 18mm FLY Carbo T2 Soft-Attach Block - Open Centre
RS Aero Tapered Kicker Control Line
What tools are required?
None.
Description
The class rules state the following:
“It is permitted to attach to the gooseneck a block of no more than 20mm diameter using rope tied around the vang gooseneck block (the attached block being no more 60mm from the gooseneck block) and to lead the vang rope through that attached block rather than the gooseneck block.”
The Harken block is ideal for this, and comes with a length of cord that can be used to secure the block to the gooseneck. The end result should look like this:
The Rooster tapered kicker comes with a pre-spliced loop, so it is simple to install on the boat – pass the loop through the becket on the harken block on the boom, and then pass the entire line through the loop. As you thread the kicker through the blocks, do be careful to avoid ‘crossover’ of the rope. You should be able to thread the kicker such that there are no ropes rubbing against each other. Once rigged, the tapered kicker looks like this:
Additional Notes
The Aero comes with a dyneema primary vang line, set up of this line is crucial to make sure that you have the maximum available travel on the secondary purchase. In short, when you set up the vang, you need the blocks to be touching, like this:
After you have used the vang in anger you will find that the loops on the mast and booms are bedding in and that the dyneema has stretched, and the primary line will have to be shortened to compensate. I left the vang on max for 20 minutes on my drive and then had to shorten the primary line by 10cm or so (that’s 4” for stateside brethren). Before shortening it looked like this:
You should expect to keep adjusting the primary line as you use the boat, the objective needs to be to keep maximum travel in the vang. I might be tempted to try ‘Rooster Zero’ to keep stretching to a minimum, but have yet to do so.
2. Easier Controls: Downhaul and Outhaul releases
Imagine the following scenario. You are using your new Aero in the Nationals for the first time, picked every shift on the first beat, and rounded the windward mark at the head of the fleet. It is a solid 25 knots, and you have been using max downhaul for the duration of the beat. As you approach the windward mark, you release the downhaul and outhaul, and just before the bear away you release some vang. A little windward heel and glorious bear away, photographers snapping away from a rib, a tear in the eye of the jury boat as they witness flawless execution.
A short way down the run you realise that the downhaul and outhaul are still on more than you would like – releasing the vang has allowed for more scope of release on the downhaul and outhaul. But you are right at the back of the boat, and don’t want to shift weight forward to adjust. In a light spot you decide to nip forward to release the controls further, but alas, a unforeseen gust hits the boat and you spin in a capsize to windward. The fleet sail by, making helpful remarks on capsize recovery (they are all trying not to smile, but inwardly, they are all smiling and looking forward to post- race analysis).
Downhaul and outhaul releases make it easier to release the control lines in a single action, rather than needing multiple passes as other controls are changed. So you can release before the windward mark, and be confident that you will not be readjusting on the next leg of the course. It is a relatively inexpensive upgrade that just makes the boat easier to sail.
What kit is required?
For the downhaul release:
1.5m of 6mm shock cord
1x spring hook
For the outhaul release:
2m of 6mm shock cord
2x Medium Inglefield clips
What tools are required?
None, but the following is useful (once you have used a hot knife for cutting rope you are unlikely to go back to a knife and lighter):
Hot knife kit
Also worth learning how to tie knots in shock cord, in particular the Zeppelin Bend
Description
For the downhaul release, you need to thread the spring hook onto the shockcord, and then create a loop of cord attached to the upper downhaul block. The Zeppelin Bend referenced above is a good knot to use to make the loop. You then make a loop in the halyard tail – this is the attachment point for the spring clip. Once installed, the system looks like this:
You can see the halyard loop and spring clip at the top of the picture, next to the ‘7’ on the mast, and loop of shock cord running down the mast to the downhaul double block. If required, you want to adjust the length of the loop such that there is a very slight tension when the downhaul is on maximum release.
The outhaul release is straight forward. Pass the 2m length of shock cord through the clew, and attach an Inglefield clip to each end using a simple stop knot. The shock cord gets taken either side of the boom mainsheet blocks to the first of the vang loops on the boom, and the Inglefield clips connected (on the right in the picture below).
Additional notes
There are many different ways to facilitate the release of downhaul and outhaul, this is just one example. I’ve used this set up for a couple of years with no issues, but have seen more elaborate systems on other boats.
I did try using 8mm shock cord for the downhaul release, but found that this made the downhaul too difficult to pull on – 6mm appears to the be good balance.
Minor point, if you make up your own system, be careful not to use a metal clip where it can abrade the carbon spars.
3. Easier Controls: Replacement of Downhaul double block
The aero comes rigged with a double block attached to the deck, to be used as the lower block in the downhaul cascade. The Aero Class Rules (specifically C.6.1.3(v)) allow for this block to be replaced by two single blocks.
The use of single blocks in the cascade reduces friction, and so makes the control easier to use. Worth noting that wear on the blocks is reduced as well.
What Kit is Required?
2x Harken 2698 18mm FLY Carbo T2 Soft-Attach Block - Open Centre
What tools are required?
None, but a needle fid can make it easier to fit the blocks
Description
This picture shows the double block to be replaced (centre), and the two singles to be installed (left).
The picture below shows the two single blocks installed. I’ve used some Rooster Zero (UHMPE/Spectra) to attach the blocks to the deck, but there is no reason not to use the cord that comes with the blocks (I did this to match the Dyneema of the other blocks, a completely unnecessary attention to detail that must have cost £’000s over the years!).
4. Easier controls – Easysplice for the downhaul and outhaul
The standard RS rigging pack comes with downhaul and outhaul lines that are already cut to length, each line has a small loop at both ends. Once the lines are threaded through the blocks, they are connected using a ‘lashing’ (see pages 19 and 15 in the rigging manual). Whilst I have no doubt that RS have tested the arrangement to the extreme, I personally prefer a splice to join the tails of the control lines, I find it runs through the small diameter blocks very easily, and I can never quite trust the ‘lashing’ approach!
Again, some sailors will be fine with the standard approach, but I note that a lot of sailors prefer the spliced rope solution.
What Kit is Required?
For the downhaul secondary control line: 8m of blue/white EasySplice
For the outhaul secondary control line: 5.5m of black/white EasySplice
What tools are required?
Splicing tools are required. You could do worse than buy the full kit, makes this type of job very easy.
Description
Follow the rigging manual, but instead of lashing the ends of the control lines, use a splice. For instructions already available on the Rooster blog
Other Small Stuff
5. ‘Main halyard primary’ upgrade
The Aero primary halyard is attached to the tail using a double sheet bend. This arrangement can be frustrating as the knot can catch in the eye at the top of the mast, making the sail more difficult to hoist and drop.
An easy solution is to make a primary halyard using EasySplice, with a loop that is attached to the tail using a bowline. This does not catch in the eye at the top of the mast, and makes hoisting and dropping just a little bit easier. You can buy one off the shelf from Rooster, including the plastic bobble.
6. Mainsheet upgrade
The standard mainsheet that comes with the Aero is 8mm Kingfisher ‘Braid on Braid’. It is a rope that is ‘soft’ and easy on the hands. The class rules allow for a mainsheet from any manufacturer, with a minimum diameter of 6mm and a maximum of 9mm.
A couple of seasons back, I tried a 6mm Polilite mainsheet for light winds, on the basis that there would be less friction through the blocks, and Polilite does not seem to form knots whilst lying in the bottom of the boat. After a few months trial, I now use 6mm Polilite as a mainsheet in all wind strengths – I do not have problems with sheet loading despite the relatively small diameter.
If a 6mm mainsheet seems a bit too small, there is a 7mm option that is already cut to size and even 8mm if you are happy to purchase by the meter. .
10m of 6mm Polilite mainsheet
10m of 7mm Polilite mainsheet:
7. JC Strap
A JC Strap helps the boom move to outward from the boat, especially useful when bearing away from close hauled to a run in light winds. It can interfere with the release of the downhaul, but not so much of a problem if you have an elastic downhaul release. Many classes use a JC strap, they just make the boat a little easier to sail.
My JC Strap is threaded through one of the vang loops on the boom, to a block attached to the eye on the bow of the boat (there is a double block in the photo as I subsequently moved the downhaul elastic to this block, a single block for the JC Strap is equally as good). I used 6mm shock cord which seems fine, and is the recommended diameter in the rigging manual. Remember to rig it outside the downhaull!
Parts required:
2x Medium Inglefield Clips
2m 6mm Shockcord
1x block of choice: HARKEN 224 22MM SINGLE MICRO BLOCK, or HARKEN 226 22MM DOUBLE MICRO BLOCK if you want the downhaul elastic and JC Strap in one block!
8. Deck Protection
Metal blocks seem to stain gelcoat – not sure why this happens, but it can make for an unsightly deck (which is triggering to those perfectionists among us). I’m not sure whether the blocks can actual damage the gelcoat, as I’ve always protected the deck. Easiest way to prevent the staining/damage is to use protective tape, cut to make appropriately sized patches. The photo shows tape below the blocks of the downhaul.
Parts required:
2m of clear chafe tape
9. Tape the Tiller Extension to the Tiller
This only takes a moment to do, but saves enormous embarrassment when the tiller extension decides to part from the tiller mid- race.
And finally, some checks for those fortunate enough to be buying a new Aero:
10. Check the fit between mast sections
The top and bottom mast should slot together with no gap between the sections. On my new boat, the sections were separated by about 2.5mm – no great distance, but this allows the sections to rotate, resulting in a potentially misaligned mast track.
The issue was the mast track on the bottom section – it was slightly overlapping the join. A couple of minutes with a file and the mast track was aligned to join, and the sections slotted together with no gap. So if you do have a gap have a close look at the mast track.
11. Check the screws on the hull fittings
There are a number of hull fittings attach to the deck using stainless screws. I checked all screws, the majority were fine, but three required tightening. I’m not sure that any of these would ultimately have caused an issue, but for the amount of time it takes, a systematic check seems like a good idea.
12. Check for burrs on the trolley axles
Very small point, but worth checking the holes for the lynchpins on the trolley. Mine had burrs that (i) prevented my trolley wheels from being removed, and (ii) but my finger! A few moments with a file sorts it out (but you would think the person drilling the hole could at least deburr it, and perhaps use a jig to get the holes aligned to the centre of the axle).

Rooster® + Sandy Point Holiday Collab
Collaboration Spotlight: Rooster® and Sandy Point Watersports Unveil Exclusive Bag Collection
In an exciting partnership, we’ve teamed up with Sandy Point Watersports, a local business to us, based at Hayling Island - South Coast of England, to introduce a special bag collection just in time for the gifting season.
When Rory and Chris, who head up Sandy Point Watersports came to us with the idea for a collab for a unique bag range, made using repurposed sails and offcuts, we were more than excited to bring this to action. Sandy point are a local business who we already work closely with, and whom resonate to our core brand values, through our shared passion for the seas and helping customers enjoy watersports and all the other fun bits involved – from splicing cool new rope setups to utilising old parts to make something resourceful. So, this collaboration seemed like a natural fit.
Crafting with Purpose: Upcycled Sails and Rope Offcuts
The bags in this collection are crafted from upcycled/repurposed sails, and Rooster rope offcuts. The use of such materials adds a unique touch to each bag, whilst also helping to reduce environmental impact involved to make virgin fabrics. The production of these bags happens in close proximity to Rooster HQ, taking place at Sandy Point Watersports base on Hayling Island, a mere 10 miles away. Hand-stitched with care by Rory and his dedicated team, this local collaboration not only minimises travel distance but also significantly reduces overproduction, allowing for efficient small-batch production that benefits both companies.
Individual Stories Inside Each Bag
To enhance the personal connection, each bag comes with a specially designed label revealing some context into the sail used in its creation – you can use your own imagination to make a story behind the history of the sail! This attention to detail adds a meaningful touch for those who appreciate the journey of the materials.
Functionality Meets Eco-Conscious Design
Beyond their eco-friendly origins, these bags are designed for practical use. The durable water-resistant base on the large handbag and the wash bag makes them suitable for both seaside adventures and everyday activities. We’ve also included versatile carry straps and handles for flexibility in carrying and hanging and added chunky sturdy zipper closures to keep your belongings safe. You can view the range here:
As the holiday season approaches, we’re excited for you to explore this limited edition bag collection, and you never know – if it takes off, we might be tempted to continue into our main range! It's more than just a fashion statement; it's a collaboration that values sustainability, functionality, and supporting local businesses.

Aero Main Halyard Tips
Here is a neat little trick to make your Aero Halyard work a little more smoothly.
Take 1m of Rooster Easysplice and take 600mm of the inner core, but remember to tie a knot in the other end to ensure you keep the inner core where the rope stopper is. It will be hard to take out the 600mm - but give it your best shot. Then you can make a Brummel hitch loop in the easy splice (you will have to unknot the other end to pass it back through the tail. ). Examples of a Brummel hitch video can be found here. I folded the 600mm of uncored rope in half and made a 40mm long loop, ensuring the tail went back into the line over the maximum distance to fill the space that the inner core left. This gives the Easysplice the right thickness to jamb in your cleat. To ensure the boggle does not fall off the other end, you might like to back splice some of the EasySplice into the end (make it thicker). Check and adjust the length of your new EasySplice halyard to ensure the double thickness easy splice sits neatly on the cleat area. I keep using the stretchy 2mm polyester line as my pull up or uncleat line because its stretch allows the mast bend to vary lots with vang tension, ensuring that it will not pull the halyard out of the mast cleat. If you have lost the original - you can use this replacement (approx. 11m length is required) 2mm Polyester Halyard Line, sold per m.

How to fit a typical dinghy sheave box into a spar
This a short article on how to cut a neat slot in your alloy mast or boom to fit a typical sheave box. This example is fitting a small 15mm diameter sheave block (from Ronstan) into a boom for the adjustment of the outboard end of a mainsail flattener.
Tools required:
Pencil.
Masking tape.
Ruler.
Vernier Callipers. (Optional)
Hand/Electric drill and bits.
A center punch.
A small metal file. (Flat or triangular).
A 'Dremel' tool and cutting disc attachment. (Optional)
Self tapping screws or pop rivets to fix the sheave box.
Duralac Anti Corrosive Compound.
A typical Sheave box e.g a..- RONSTAN RF15711.
or the Spinnaker 4mm sheave box from Super Spar PN 409
Procedure
First make sure you choose the correct fitting for the job, based on the control rope size, and expected load that will be used on the fitting - and the position of the fitting in the spar. As you will be cutting a slot in the spar, you need to keep the slot/hole to a minimum and locate the new fitting away from areas of possible high stress areas such as spreader brackets, gooseneck areas, kicker and mainsheet take off points for booms and the like. For a typical dinghy mast the front of the mast is normally one the strongest sections of the mast, especially in the alloy tapered section, where it will be welded, as this area will be thicker. For booms, the top and bottoms of the section are the strongest areas.
Measure carefully the cut-out dimension for the sheave box. Manufactures dimensions can be used - but have been known to the incorrect, so use a pair of Vernier callipers to measure the actual fitting. You could even make a small cardboard template first to test fit your new sheave box. In this case the dimensions are 28 x 9.5mm for the RONSTAN RF15711 sheave box.
Using masking tape affix this to the area where you wish to cut the slot, and mark with a pencil and with a small Engineering ruler and square, mark out the area to be cut out. Measure and recheck before any drilling or cutting….
Using a 4mm drill bit (depends of the fitting slot cut out size width), now carefully drill 4no.holes inside the measured-out rectangle. Use the metal centre punch to tap a light mark, so the drill bit does not wander when you start to drill the 4mm holes.
Now, if you have a Dremel tool you can cut down the sides to join up the 4 holes to remove the bulk of the metal. If you do not have this tool, then simply drill more holes down each side and then file down to create a neat rectangle slot.
Remove the masking tape, and now test fit the sheave fitting and mark the position for the affixing holes.
Now drill the holes for the screws or rivets. For self tapping screws you will need to drill the correct size hole by selecting the correct drill bit size for your self-tapper screws and then let the s/s self tapper cut a thread into the alloy material to tighten correctly.
Apply a smear of Duralac Anti Corrosive Compound to the base of the s/s sheave, the edges of the new slot, and the screws or rivets you are using.
Now screw in the self-tappers (or pop rivets with a suitable gun) to fix the sheave into the slot.
(Note : Just before you fix in the sheave box, you might wish to feed in the rope or line before final fix - or feed in a 'mouse' line...)
A guide to select the correct drill to match the gauge/number of self-tapping screw
Self Tapping Screw Size
Sheet Thickness (mm)
Guide Pilot Hole Size (mm)*
No. 4 (2.9mm)
0.45
2.21
0.91
2.31
No. 6 (3.5mm)
0.45
2.70
0.91
2.80
No. 8 (4.2mm)
0.71
3.00
0.91
3.08
1.22
3.20
1.62
3.40
No. 10 (4.8mm)
0.71
3.51
0.91
3.59
1.22
3.71
1.62
3.81
When using self-tapping screws, the chart above shows the suggested drill size that you should use to drill the pilot hole. As you can see, it is not an exact science, there is a range for each screw size.
Broadly speaking, the thicker the material that you are drilling, the more you should move towards the top end of the range when selecting the drill size.
So, all you need do now is feed through your rope or halyard line and go sailing.....!
A typical valley cleat fitting, using 2 no. Pozidrive self-tapping screws (no.10) to attach. Pilot hole used was a 3.5mm drill.

SPC - Splice-able Polyester Control from Rooster
It's not often that we change rope at Rooster. We have done this to help you to avoid changing them as often on your boat as well.
Our new SPC Control line is a super hard-wearing polyester braid on braid control line - but with the added bonus of being able to splice the centre core. Watch this video to see how. I hope you enjoy it. Tools used: Rooster Easy Splice Needle Fid 4mm Push Fid Rooster Serrated Scissors

Competition entry #7: 5 Expert Level Tips from a Sailing Enthusiast
Rob knows what he's talking about, submitting 5 ideas he's discovered in sailing:
Grippy Gloves: Rubberised gardening gloves (usually yellow) are cheap, give excellent grip and last well – except that where you cut off the top of the finger and thumb, the cotton material frays badly. Using a lighter (as one would to seal a fraying synthetic rope) doesn’t work. The trick is to seal the severed edges generously with rubber glue such as Evo-stick.
Drying out the buoyancy tank by climbing under the foredeck and reaching into the buoyancy tank with a sponge is awkward to say the least. Keep a sponge permanently whipped or taped onto the end of a tough piece of wire, such as a coat-hanger, perhaps two feet long and bent into a curve. It makes the job much easier.If there is only a drain hole such as on a Laser, a small strip of towelling taped to a bent piece of wire will reach that pesky last half cup-full. The towelling can be left trailing out of the hole to ‘syphon’ the last of the water out.
In winter, don’t leave water in the mast step of a Laser – if it freezes, there is a danger of cracking the fibreglass. Have a sponge on a short length of rope and a stick (to poke it in with), to dry it when putting the boat away.
The bane of winter sailing is painfully cold hands. A couple of tips to help minimise the cold:a)Keep your sailing gloves warm and dry in your buoyancy jacket pocket while you launch, wearing instead a pair of sturdy washing-up gloves. Once finished lowering the rudder blade etc., swap to the dry gloves. b)If there is a second race after coming ashore, have a second, dry pair of sailing gloves available so that step 1 works again.
A pivoting centreboard when in the fully down position can be very difficult to hoist up, even with 2 to 1 tackle. However, if the tackle is stopped off with ‘anchor’ knots so that it is just getting tight when the board is fully down, the hoist can be ‘sweated’ sideways at almost any point along its length, giving a much more powerful pull than can be achieved simply by pulling on the hoist. The idea works just as well, possibly better, with a continuous up and down system. The ‘anchor’ point must be chosen carefully, perhaps at the eye through a bulkhead
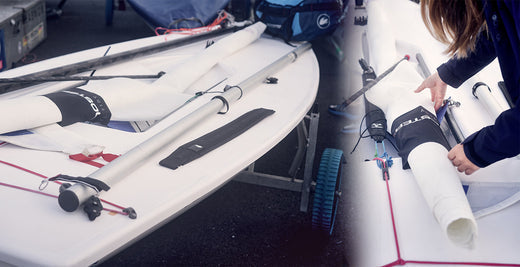
Mark's Guide: 7 Essential Tips and Checks for Winter Dinghy Maintenance
Extract from book, to be the published "Maintenance and Recommissioning of Racing Dinghies”
1. Storage
Wooden Boats. There is only one place for an all wood or composite racing dinghy to be stored, and that is undercover in a dry storage garage, workshop or shed. Even with modern varnishes (1 and 2 pot) and epoxy coatings, there is still a chance for water, ice & frost to penetrate the surface & joints and damage the wood. Expensive to repair once damaged, and water damage often ends up being painted over due to discolouration.
Plastic boats. All glass and FRP boats will survive the UK winter climate outside but invest in a good breathable cover with a deep skirt as seen in the photo 1 - on a Solo dinghy. It will also prevent UV fading of the gelcoat as seen on this blue 2000 - See photo 2 below.
Photo 1
Photo 2 - Shows typical UV fading if left unprotected, the gelcoat is slowly degraded by UV radiation causing the surface to become yellowy / white and powdery as the gelcoat is oxidized. – Can be expensive to correct.
Also, I have seen ILCA/Lasers hulls that have been dry stored (and with non-breathable PVC covers - both with top and undercovers) being stored inside with damp or wet surfaces and can suffer over time from osmosis.
Make sure the carpet or protection used on the trolley cradle is dry before storing, as this will hold water and damage the hull (both wood and plastic hulls) surface over time.
2. Sail Care
Remove the sails from your boat. Boats both stored outside and inside are a target for rodents to hibernate in and eat your sails and sail bags. The damage can be extensive.
Give them a thorough rinse with fresh water from a hose. I hang mine up to dry on the washing line (use the mainsheet rope) and then store indoors/garage/workshop. Check for any damage around the batten pockets and headboard/luff rope area and get any repairs at your local sailmaker.
3. Spars
Remove the spars from your boat, wash, dry down and then dry store if possible. Galvanic corrosion (see below photo 3 example of a RS400 s/s block mounted on the boom) can occur between the stainless-steel fittings and your aluminium mast. Note: Carbon fibre masts will not suffer from galvanic corrosion but metals in electric contact (and the presence of an electrolyte such as salt water) with carbon can cause issues.
Photo 3 - Above (red arrow) shows typical galvanic corrosion that occur between the stainless-steel fittings and your aluminium spar.
If you find an issue, then remove the stainless fitting, and clean the area behind them thoroughly. Bed the fittings down with Duralac paste applied to the entire surface when putting them back, taking care that there are no voids between fitting and mast wall where water can get in and stand. Duralac also provides corrosion protection. Also, add a smear Durlac on the screws or rivets when affixing the fitting.
Duralac paste (photo 4) is a chromate containing jointing compound designed to inhibit electrolytic decomposition between dissimilar metals – often called galvanic corrosion. It is a single pack, air setting product. Used correctly, Duralac prevents anodic decomposition.
Photo 4
4. Hull Upkeep
Wash and polish the hull. Many sailing areas around the coast suffer from the issue of sewage discharge into the sea and harbours. This is especially noticeable on the light breeze days, when a light brown scum line can be seen on the waterline of your dinghy.
Wash down every time you exit the water and sponge off the hull. The discharge is stubborn to remove and will stain especially FRP/Glass boats as seen in photo 5 and can be difficult to remove without a good deal elbow grease and a product like the Facecla G3 Fine Finishing Compound to remove the staining. Finish off with a good quality polish such as the McLube polish.
Photo 5 – Pollution staining
5. Ropes and control lines
Remove and wash the control lines and sheets (remove all non-continuous control lines). You can put the control lines in a bucket of warm water with a mild detergent to soak. The mainsheet, jib and kite sheets in a pillowcase, tie off the opening and put in a washing machine on a cool temperature wash with a suitable conditioner. When the cycle is complete remove from the machine and allow to dry off before storage.
6. Security
If the boat is stored - especially in the winter months in the local dinghy compound or park, make sure that the boat is tied down well, the cover is undamaged and that the securing clips are locked in place and tightened. It is important to check that your insurance covers you for winter outdoor storage. Make you own ground concrete tie down anchorage fixings if needed. (Photo 6)
Photo 6 - Build your own concrete tie downs - if permissible by your club.
Use wheel clamps & hitch locks, plus padlocks and chain (photo 7) for added security.
Photo 7 - A substantial wheel clamp and padlock.
7. Maintenance
Deck fittings
I recommend slightly loosening off the tops off your cam cleats and giving them a thorough clean with mild detergent and fresh water. When dry, apply a dab of Harken McLube OneDrop Ball Bearing Conditioner. Do not use grease or oil as this will attract salt particles next season. Damaged cam springs can be replaced, and you may need new cams cleats if you have signs of wear on the cam teeth. Ball bearing mainsheet block systems and traveller cars need particular attention, flush through with fresh water. It’s a good time to check traveller cars are running freely and replace if necessary. Check all rudder fittings both for galvanic corrosion between the alloy fitting and the screws/bolts. Check for tightness of all fixings.
Toestraps
One the most used items on the boat and take considerable amount of stress and strain during the season. They generally start to wear at the edges, around the pressed in eyelets and the mounting points (if they are screwed down via the gripper plates) check the fixing points and tighten any screws and replace any adjustment ropes as necessary toestraps should be given a good clean and thoroughly washed with freshwater. Toestraps are easily replaced and are relatively inexpensive and can smarted up an otherwise tatty hull. Check your gripper plate screws for tightness as seen in photo 8.
Photo 8 - A typical toestrap gripper plate.
Foils.
Rudder and daggerboards/centreboards are easy to work on indoors. Check the leading and trailing edges for signs of damage before storing away. Any gelcoat work should be done at this time in a warm (indoor) environment.
Bailers leaking?
Now is the time to replace those internal rubber seals with a service kit. Otherwise, if not leaking, then just putting the bailer down and then smearing a small amount of Vaseline along the sides and back of the wedge that protrudes below the boat to keep it in good shape. Then put the bailer up and wipe off any excess.
Trailers and Trolleys.
Trailers: Grease the bearings (or replace the entire hub if corroded (photo 9) or you have worn bearings - and they become noisy or stiff when rotated). Locate the grease fitting—it is the nipple (photo 10 - see the red arrow) that fits into the female end of a grease gun. Squeeze grease from the gun until bearings are well lubricated (but not too full).
Photo 9 - A trailer wheel & hub in poor condition.
Photo 10 - Location of the hub grease nipple.
'Milky grease' in the bearing is a sign that it has been compromised by water. If this happens, repack all bearings or replace. Lubricate your wheel nuts. Doing so will help you to loosen them when changing wheels. This is especially important if you are fixing a flat by the side of the road. Wheel nuts tend to rust easily. Use Copper Ease grease to lubricate the threads to stop them seizing. Check your tyre pressures. Check the tyre sidewall (also for sidewall perishing) for the correct pressure and ensure the tread depth is not below the legal limit. 1.6mm is the legal minimum tyre tread depth for all vehicle tyres, including trailers, a minimum of 3mm is recommended, as this ensures the safest driving - and towing - experience across all road and weather conditions. Below this level, handling can be compromised.
Trolleys
Check you glass fibre cradle(s) for cracks or damaged, and repair. Replace the any damaged foam covering or use the Astro Turf matting – (See photo 11). Get any metal/welding repairs done now rather than in the middle of the sailing season. Repairs will almost always be cheaper than the cost of a new trolley. Consider replacing your pneumatic wheels with puncture proof wheels/tyres if your boat is launched from a hard surface. (Not recommended for sandy foreshores).
Photo 11 - Astro Turf matting.
Astro Turf matting (photo 11) as used on the trolley cradle. Reduces water retention and possible scratching of the hull from any grit and sand held on the cradle. Consider a set of puncture proof wheels as seen in photo 12 - ideal for launching from hard surfaces.
Photo 12 – A puncture proof trolley wheel
Photo 13 - A wide 'beach wheel' used on for launching on sandy and soft launching areas.
If you leave you boat outside, use a decent prop, so if any water that does get in - it can drain out. -Photo 14
Photo 14 - Use a prop to support your dinghy.
Final bit of advice!
Investing time now to prepare your dinghy for winter will pay dividends when the warmer weather comes around, enabling you to get sailing quickly again without any fuss. You will also have helped to protect your investment for the longer term.

The Story of Rooster - Words from Founder Steve Cockerill
- Written by Steve Cockerill
When I started the brand, I was so keen to break down the divide between those who knew how to sail a boat and those who didn’t. I was passionate about sharing knowledge — giving people the confidence to enjoy the sport more.
It really all started with me being quietly determined to improve the mainsheet on a Laser (now the ILCA). That was my first goal. I’d tried working with some well-known rope manufacturers, but nothing was quite right. Then I had a brainwave and decided to try it myself. I bought a couple of miles of rope based on that idea… and it worked. People loved it. The breakthrough moment came when I shared it with Robert Scheidt — who was the No. 1 Laser sailor in the world at the time — and he faxed me back saying how much he liked it and asking for more. I’ve still got that fax to this day. That was the spark that made me think, maybe I really could do this.
It started in a room upstairs in my house… then a spare room and a shed in the garden… then a double garage and the lounge… then a small unit, then two units, and then a bigger unit. Now, we’ve got a warehouse and office in the UK and a distribution unit in the US — and we’re just about keeping up! I’m still amazed when I look outside and see how many cars are there… and how many great people are working at Rooster, helping it grow.
It’s taken a long time — and a lot of passion — to build the brand. Friends of mine used to say, “You’ll need at least a million pounds to turn a vision into a brand.” But I thought, no — you just need to make products people really need. Maybe I was a bit naïve. It’s definitely taken more than just money to get Rooster to where it is today. It’s always been a passion project — and it still is. We’re always checking ourselves, asking if we’re being fair to our customers. And it’s still great fun to represent the brand at events, chat to sailors, and see people enjoying the sport. That’s the best bit.
Every now and then people think I’ve retired — which is quite funny, because I haven’t! I’ve just changed my outlook. My wife finally retired from a high-pressure job in school senior leadership, and together we’ve managed to share the workload I used to carry — particularly on logistics and factory liaison. We even split my salary, which has given me a better balance… it’s less five or six days a week now and more like two or three.
Handing over the day-to-day running of Rooster to Luke Morrison wasn’t hard at all. Luke had grown up with Rooster — he first joined us as maternity cover, but quickly showed himself to be a real force. He’s brilliant at building relationships with our dealers… a total diplomat, to be honest. In fact, I think I was holding him back! Luke’s got so much drive, it made complete sense for him to take the lead. You might think that would be hard as the founder — but I know Luke’s as committed to Rooster and its ethos as I am.
So now, I’ve got plenty of time to keep working with our factories, stay close to the logistics, and enough “playtime” to keep me fired and excited for the years ahead.

Ronstan Orbit Lashing Blocks and Attachment Methods
Ronstan’s latest range of small 20 and 30 mm diameter Orbit blocks are designed to be used on dinghies and keelboats and are versatile enough to be used in most applications where strength, weight and friction-free running are important. The design of the range is based on modern ropes to secure with the elimination of heavy rigid shackles.

How to Recover Your Boat With an Onshore Breeze
How you recover your boat safely with an onshore breeze depends on the type of boat you sail.
As a Stokes Bay sailor, I had to quickly learn the 'Coming Ashore in an Onshore Breeze NVQ' in my Laser and more recently I have been discussing with the expert Skiff sailors how they handle coming ashore with their perhaps slightly more fragile skiffs as we still feel we have to work on our technique in our Rooster 4000 to pass that NVQ when it is significantly windy.The key to a successful recovery, whatever the boat, is to remove all power from the sails and point the bow at the beach. Removing all power from the sails and point the bow at the beach can be harder in some boats than others. In big waves attempting to turn the boat towards the wind is not viable as recovery backwards onto a trolley is near impossible and at the point of turning towards the wind you are very venerable to capsizing, which sadly can cost In a laser - we tend to drop the knot in the mainsheet so that the sail can flutter in front of the bow. I do this by shooting head to wind, perhaps 50 yards upwind from the shore where I intend to land, and grabbing the knot from the outer end of the boom. I find it easier to ensure there is plenty of slack in my mainsheet so I am not fighting the knot to come out. You might also take into account the strength of current too when you factor where you put yourself. Once the knot is in my hand, I can drift for a while to check my calculations were correct before finally dropping the knot and taking the rest of the sheet into my boat. At this stage there is no rush to remove the centreboard or rudder as these act as general guidance, keeping the boat in course to my intended recovery position. Meanwhile I untie my kicker line from the handle on my centreboard and the retaining elastic so I am now free to pull the daggerboard up at an instant. I leave the rudder and tiller fully down and tied on. You might think this is daft as I might ground. At the point of near touching, I jump out of the back of the boat and grab the transom by the traveller rope. As the laser® rudder is so short, if I am up to my waist, I can easily keep the rudder off the ground whilst I push the retainer and remove it fully from the boat. In big wave this is the safest way for the rudder too - as if it is raised it is more venerable in waves.When the conditions are very harsh I drop off the back of the boat to act as a sea brake whist hanging onto the traveller rope. Hopefully a friendly sailor can throw my trolley into the water wheels first so I can push my boat quickly out of the surf. If however, as was the case at the weekend, that I am the first ashore with no shoreside help, then to save the underside of my boat, I will capsize it and push it up the beach on its gunwale.
Drop the Knot - in a laser®
When you can't let your sail in front of the boat - then you have some sails to drop: The Skiff fleet at Stokes Bay all drop their sails along way off shore, then roll them from the head and tie a mainsheet round the rolled sail and the boom. The rest is pretty similar to the Laser®. I was also advised to drop the knot of the jib sheet of the Rooster® 4000 as well as roll the main. I imagine that in dropping the jib knot early, you have less to try and make the boat bear away when you are trying to pull down the mainsail and rolling it, which might be a significant help. We are psyching ourselves up for a windy onshore to test out our 'drop the knot' techniques in the 4000. Whatever happens there are usually lots of highly experienced sailors who are happy to save your bacon if it all goes peak tong!

Your New Rooster Trailer - Loading tips, User Guide & Care.
Once you have taken delivery of your new Rooster road trailer, below you will find some useful information about setting up the trailer and its care.
Boat Loading TipsInside – Tie all your sailing and boat kit well in place using padding to prevent any scratching to the hull, and put any kit bags evenly distributed over the axle to maintain nose weight.Covers – Ensure covers are put on tightly to reduce flapping, which can rip the fabric.Boat – Make sure your boat is on its trolley properly (forward & horizontal) and the trolley is securely fitted on the trailer. Tie the front of the boat forward and down to the trailer. Tie the back of the boat down at the most rear point of the trailer to stop it lifting away from the cradle (don't tie it too tight as this can stress the boat or damage the cradle). Use padding under the rope/strap to protect the cover/boat. If using rope make a purchase loop below the gunwale to tighten.Mast – Halyards and shrouds etc. need to be secured to the mast to prevent frapping which can cause scratches. Use the mast support on the trailer to take most of the weight of the mast by placing the base as far forward as possible. Ideally use a transom mast crutch (not supplied with a Rooster trailer) to secure the mast at the rear. An adjustable rear mast support can be purchased here
Why not remove the standing rigging and use the Rooster Rigging Bag? See HERE for more detailsLighting Board – The pull-out lighting board support arms must be tightly secured into position (ideally so that the lighting board is just behind the transom of the boat) and the lighting board secured to them using the supplied elastic straps. Then use a padded trailer straps (not supplied with a Rooster trailer) over the top of the boat to tis the arms together to reduce lighting board movement and vibration.Hitching up – Make sure that the trailer is securely fitted to the vehicle and the secondary coupling is also in place. Remember to plug in your lighting board in! Vehicle – Please make sure the towing vehicle weight is less than 22 tonsSetup and User Guide1. Unscrew all clamps.
2. Lift arm until in a straight line and slide arm back to the required length.3. Bolt into place and tighten all clamps.4. Do the same of the other side of the trailer.5. Place the trailer board at the back and fix using the shock cord/elastic supplied. Plug the trailer board into the socket at the front of the trailer by the mast support.6. Tie the arms togther over the top of the boat using a padded trailer strap to reduce arm vibration.
7. Also do not forget to check/tighten the lower front mast support bolt.
Trailer Care InformationAll Rooster trailers are EU and UK Type Approved and comply with current construction and lighting regulations. However, the responsibility lies with the driver of any road vehicle to ensure that the trailer is used as designed and is in working order.Lighting Board - Under new legislation the lighting board and it support arms are part of the trailer and are also type approved . Before using a lighting board always check that all the lights are functioning correctly. If the trailer stays outdoors, take the lighting board off and store it inside.Tyres - Keep them pumped up to a maximum of 58psi for 8" wheels and a maximum of 58psi for 10" wheels. Replace every 5 years as a matter of course. Check that the tyre has a 1.6mm of tread over the central 75% of the tyre width for the whole circumference, also check for cuts or bulges. (Always carry a spare wheel plus a Wheel Brace and a Jack).Wheel Nuts - The wheel nuts must be torqued to 57Nm. It is ESSENTIAL that the torque settings are re-checked after the first 30 miles or 50 km and subsequently before each journey.Wheel Bearings - Check once a year and re-grease as required.Paperwork - Keep your certificate of conformality that comes with your new trailer.Extra items to consider:
Spare 8" wheel HERE
Spare 10" wheel HERE
Spare Trailer Hub HERE
Rear mast support HERE
For more information on towing please visit https://www.gov.uk/towing-with-car and https://www.gov.uk/towing-with-car/trailer-and-towing-equipment

Layering for Dinghy Sailing in Winter
Sailing in the UK during the winter time might sound like a bad idea, but with the correct kit you can be comfortable and unrestricted - it's all about selecting the right layers for the job. UK winter time is generally between 3 and 12 degrees, often windy and very damp.
Base layersStart with our PolyPro garments. Worn next to the skin, they are naturally hydrophobic so you will remain warm and as dry as possible. These garments will come out of a good spinner almost dry enough to wear and are available in top, bottoms and socks for men, women and junior sailors. "On cold, wet days I find myself wearing them to the club under my jeans. My wife loves her PolyPro Socks and gets rather upset if she loses one". Upper Body:Mid LayerThe ThermaFlex™ top is the most adaptable mid layer made at Rooster. Used on its own you can cope easily in windy hot climates, or in less windy British summer climates. When combined with a Polypro top you can sail through all but the worst of the UK winter season. These are available in Men's, Women's and Junior sizing.
Having argued for the versatility of the Thermaflex® and Polypro combo, if you are really serious about being on the water when most would rather be drinking mulled wine at the bar, then the Supertherm® Top is ideal. Again, this is available in Men's, Women's and Junior sizing to make sure you get the best fit for you.
Outer LayerAquafleece® - Classic, Pro Lite and Pro versions to suit you needs and your budget.The Aquafleece® Range isvery popular with many other watersports enthusiasts. Rooster designed the Aquafleece® fabric, the style of top, and own the trademark. With a wide range of colours and styles available, you can be sure they all stop the windchill in a more comfortable and snugly way to a standard spray top. Classic and Pro Lite now also come in a ladies' fit in the colour teal and the Aquafleece® Hoodie is a true favourite with the paddle-boarding community
Lower Body:"I wear my Pro Hike Pads inside Supertherm® Longjohn inside a pair of Race Armour Lite shorts" Steve.
SuperTherm® is a 4mm "winter" Longjohn and comes in Men's, Women's and Junior sizing.
Accessories:Head Gear - My Dad used to get rather hot under the collar when he saw sailors in cold weather not wearing a hat. I must have heard him say that you can loose 3/4 of your body heat through your head so many times that I almost believed him. I absolutely love the Aquafleece Beanie and Pro Aquafleece Beanie. It's just the right tension which means it's not going to fall off in a winter gale, in or out of the water, and when I get hot from working hard, it's the easiest thing to take off and stuff down the front of my buoyancy aid during the race. The Pro version has taped seams and extra thick Aquafleece® fabric are ideal - at least my Dad would be happy.The Aquafleece Neck Gaiter is also a great shout, keeping the wet and the wind-chill from your neck, ears, jaw and your nose if you pull it up. There's a variety of colours available in our Aquafleece materialHandsHands are the hardest things to keep warm AND keep the dexterity you require. My first recommendation is to use Polypro Glove Liners. Worn under a pair of summer gloves, they can work down to 8 degrees or so. Our Aquapro Gloves are very unique and warm. However, the Aquafleece® fabric itself is not cut out for rough rope work, so we have used as much extra reinforcement as we can to ensure you get the grip and dexterity you want. If you have a strange grip on your rope you might find they wear more quickly than you would like. Your next option would be our All Weather Neoprene Gloves which use a heavy duty Amara all round with extra soft PU coated grip for the high load areas.
Polypro Glove LinerWe hope this helps to get you clued up for winter weather gear and if you're ever unsure, our lovely customer service team are more than happy to offer their advice too.

Simple Eye Splice in Spectwelve - VIDEO
Sometimes the simple things look the best - I hope you find this video useful. Be inspired - buy lots of Rooster Spectwelve or SPC rope and the 4mm Rooster Spicing Fid too - or even the Splicing Combo package!

Maintain and Repair your Topper Bailer
BAILERS – Maintain and Repair, prior to you first event! The Super Shute 60 bailer (pic 1) is expensive and is easily damaged through misuse and accident. We are always trying to find ways to keep your costs down so here goes: MAINTAIN
It only takes a moments carelessness to cause terminal damage to the bailer as the boat is slide off the trolley. How many of us have had to replace a bailer as the rest of the fleet heads off towards the start line? Just the kind of stress we don’t need!
Rinse the bailer out after sailing to get rid of any grit.
Lubricate regularly to keep the rubber soft and slippery. That way the shute will go up and down without force – we don’t want the handle coming off in our hands in the middle of the race because we had to pull too hard! DON’T USE DRYLUBE – it makes the plastic very brittle. The one in picture 2 is available at DIY stores for putting waste pipes together.
Be aware that cold weather makes plastic more brittle and needs more careful handling
REPAIR You can replace the whole thing which has the advantage of taking very little time. Do check it’s in the correct way round (don’t ask!).
Incidentally you must use the original (or equivalent) nuts and bolts to stay class legal.
The Topper class uses Y10 bolts to stay class legal. These are pan head bolts. see : Topper Y10 Gudgeon Plate/Bailer/Centre Main Screw - Single - A4 Stainl – ROOSTER UK (roostersailing.com)
Rooster Sailing stock a number of the parts that break (shute, gasket, handle and flap – see pics 3 &4) and it is always cheaper to repair rather than replace. The following can be done with the bailer still in the boat but it is so much easier with it out:
Unscrew the plate from the bottom of the bailer (pic 6) – they are small fiddly brass screws I’m afraid.
Un-clip the little circlip from one end of the stainless handle pivot with a small screwdriver – careful they spring everywhere!
Drive out the pivot with a suitable punch which is best done in a vice (pic 5). If the handle falls off in a race, hold on to it because we cannot source the pivot.
The shute will now come out through the bottom and can be replaced with the new one. Be careful which way round it goes – there is a hollow in the rubber seal (pic 7) that accepts the small piece of plastic on the thin end of the shute that acts as a hinge.
The flap (pic 8) should be fitted to the shute prior to fitting and it is possible to re-use your old one. The flap pivots on two tiny lugs that come out of each side. They are so small and flexible that you can bend them backwards and forwards a number of times before they break. The old one can be pulled off (just go for it) and the lugs straightened out. I put one of the lugs into the appropriate hole on the shute and pull the flap into place. That way you hope the other lug will seat in the other hole on the shute. Wriggle (a technical term) the flap around until it moves freely. Replacements are cheap so you can afford to take a risk.
The pivot has to be driven out because the hole through the plastic tube is tight and it doesn’t need to be. While it’s out why not drill the centre out so it’s an easy fit?
Reassemble the handle again taking care of flying circlips.
Then of course the plate gets screwed back on and the bailer fitted to the boat. Having a ready repaired bailer as a spare is probably a good idea so you can rotate between the two if and when they get broken.
GET YOU HOME REPAIRS If the worst comes to the worst and a bailer comes apart during a race there are two things you can do depending on what breaks:
If the handle comes off (hold on to it remember) and the shute falls out then there will be a large hole in the bottom of your boat (fortunately Toppers do not sink but carrying a small swimming pools worth of water around with you is not fast). You could do with plugging it. I made a simple device (pic 9) out of two bits of plastic and a piece of elasticated rope. It’s a bit hard to see but you fit the lower end through the hull from the inside and twist it sideways. The top piece slides down the bungy which is cleated off in a ‘V’ I cut out of one side of the hole (a knot in the cord holds it in the ‘V’.
If the hinge breaks off then use a small length of rope to tie the handle off to the side toestrap.
Clearly in both cases you no longer have a self-bailer but the water can be kicked out of the boat backwards.
The Super Shute box instructions can also be found HERE

ILCA/Laser Toe Strap Adjustment - Simples (V2)
Roosters offering for an adjustable toestrap for an ILCA®/Laser (now legal) This uses 2m of 4mm Easysplice Continuous Control Line a Clamcleat CL 828-68an and a single 5mm Shock Block The 5mm shock block has been added to our kit in May 2023 to improve the effectiveness of our offering.
We can supply the New Rules Toestrap Adjustment System for the ILCA/Laser as a kit to make it easy.
The video below helps show you how to rig it. Its actually now really simple.
If you have already purchased the previous version (pre May 2023) you can re use the rope and cleat. All you need is to purchase the single shock block - its a 5 minute change. once you have undone your knots.

How To : Change a Universal Joint on a Rooster Carbon Tiller Extension
We are proud that you can change your universal joint in the blink of an eye with our Rooster Carbon Tiller Extensions.
If you need to cut down (shorten) your tiller then simply remove the small cross headed screw, extract the inner plastic sleeve and UJ and then carefully mark and cut the tube with a hacksaw (use a good sharp or a new blade) the carbon tube to length. (TIP Use the Rooster tape to mark the cut line so it nice and square). Use a small metal file to remove any sharp carbon burrs from the new cut end.
Now, drill a new 1.0 mm hole in your tube, (use the old cut off piece as a pattern to find the hole position along the tube) insert the inner sleeve with the 2 holes lined up, and then re-fit the UJ, and screw in the small cross headed screw to complete.
See the video below for more on how to change the UJ fitting:
Personally, I do not use the clear joints with rope cores as I believe that the lack of pigment in the rubber encourages UV damage and its early failure, so I use the RWO Omniflex UJ.
Once you see the first signs of creasing and cracking in the rubber, it is less than a minute job to change it for a new one - and that's without any extra lubrication.
P.S. any washing up liquids are suitable, not just fairy! It is equally easy to change your universal joint to any of the common brands.
I use the Sea Sure Flexible UJ on longer extensions as I like the extra security and ease of releasing with the new SeaSure Slick Release.

RS400 Tuning Guide
Reflections of the 1st Season in the RS400
So our first season of the RS400 is almost over. We had never looked at an RS400 as an option for us as we considered ourselves to be too small. At 143Kg (22.5 stone) we thought we fell between the RS200 and the RS400. Encouraged by the size of Stewart & Sarah Robertson at the Endeavor Trophy, we sold our Aeros and turned them into a nice shiny new RS400. Reading the 'tuning guides' I was reassured that some teams were in our weight range. I did my best to set up the boat with the lighter crew weights and found it quite a handful upwind. It was not until we raced at the Draycote Sailjuice where we discovered that RS400 sailors measure their spreaders from the track - not the mast wall. So we had been sailing with seriously long spreaders in the region of 415mm (a heavyweight set up) when I thought I was on 395mm. I recall that we were a bit high but slow upwind which we compensated by easing the rig tension, but really quick downwind. I am still encouraged to try longer spreaders again. We were also racing at Chichester Yacht Club's winter series against some very competitive Merlins with some success; perhaps we were suited to this boat - at least in the confines of Birdham Pool (Chichester Yacht Club's sailing area). We also raced at the Bloody Mary and found the low fast route upwind of Mark Oakey was impressive. We eventually changed our set up for shorter 395mm spreaders. Whenever we raced in light winds, we were fast. The Chew Valley Open meeting was a case in point. It was about this time that I experienced with packing the front of the rudder stock to give me more feel. This gave me the confidence to sail the boat upright as I had some decent feel on the rudder. In the light winds on Saturday, we won both races - then got a lesson in upwind and downwind sailing on the Sunday in big breezes. Reflecting back - we felt we had pace upwind, but none at all downwind. I resolved to put the spreaders out to 405mm. We shared some tips and experiences of the Warsash Open on the blog at the time. Our wing wangs were startig to wear out, so after investigation, I realized that they had been too short, so our pole was not projecting/angling wide as the passive handle was tight against the cleat. Was this the new downwind magic speed ingredient I changed the rope for Halitec (its Technora/polyester outer is super hard-wearing and its SK78 inner core is a super low stretch) and checked that the passive line was not restricting the active. The Southern Championships were light winds - which boded well for us lightweights. However, we had sold our sails the weekend before and I had not checked the new set. Wow, the mainsail looked very different - (not really - I had just not adjusted the batten tension) They were very flat as the battens had not been tensioned. We were on the pace but lacked a little height. I put it down to the batten tension - and added considerable tension to all the pockets after we had finished. We tested our new batten tension at the Burghfield Open. We had pace all round the course, but it was light winds and the twist we set up with our shorter spreaders might have helped. We wanted to test our rake-ing regime throughout the wind range. I hear many who are sailing with a very upright rig - they quote 7m odd in light winds. We, however, had settled on 6m 96cm as our most upright in light winds. I could not find a definitive mast rake method when chatting to the RS400 sailors in Garda - so here is my method: Firstly I test my tape measure is in the correct position on the mast. I check it reads 80cm on the top of the gooseneck. and then measure to the top of the GRP of the rudder gantry. We leave 5 threads on our mast ram - never move it and drop one-half hole for moderate and one-half hole more for dogs off chains. I measure 28 on a new loos gauge. Don't forget to rotate your plastic parts of the loose gauge. As they wear out, they under-read. I have marked the worn parts of my wheels (with a black pen).
Bass Week, photo by Peter Mackin
We went to Bass Week to test our Rake-ing regime. It was typically windy. We were happy with our one pin down rake in most conditions. So our rake was more like 6m 93cm for most of the week. The conditions were testing with some general handicap style reaches which Mark Sommerville and Joe Roberts relished. Once home in the sunny south, I had the time to test the trueness on my rig.
Centerline check
You might find it hard to see but the line is black and runs up the mast. I am holding it with my other hand.
I took a line from the bow to the transom - and also held up a thin line from the upper gudgeon to spy if the mast was upright. The jaws of my boat needed to be re-trimmed - I used some old sail battens - one from my Dad's old Merlin - which gave me a tinge of nostalgia. Some other important tips: Please change your main halyard attachment to the top of your masthead (only works on newer masts) Be aware that the crane itself damages the main halyard. Even Halitec's Technora/Polyester mix can be cut by the sharp edge of the sidewalls of the crane. Rigging - my first method of setting the shrouds was now perhaps comical. I would wind the mast ram back to enable me to attach the shrouds and then fight the mast ram back to its place again with the shrouds under tension. After chatting to the A team at Garda - there is a much simpler way. Release the jib tension and leave the mast ram well alone - and then lean on the main halyard. (you can even do it on your own if someone is holding the camera)
The next big lesson we learned early on. The spreaders are measured from the mast track - not the sidewall or are they. I heard many different stories over the season. Out set up was: 405mm spreader length and 140mm deflection (we are 143Kg ). However, we have added just another half a hole on the spreader width - so now about 410mm. This gives us slightly more offwind speed but we do have to rake a little sooner.
Don't be put off sailing an RS400 if you are 140kg combined. The rig is very adaptable, the boat is a dream to sail and the fleet is competitive and friendly. Sarah thinks that it is a great boat for girl crews. :-) These settings are not definitive - I am thinking now of pushing the spreaders out a little more to gain some downwind speed and a little more height upwind... however, a 3rd at the UK and Irish Nationals would suggest we are pretty nearly there or are we? A windy week would have produced a very different result. The rope used on the RS400: Spinfast (4mm) - Spinnaker Halyard Jib Sheet (7mm black) and Main Sheet (8mm) Polilite Spinnaker Sheets - 6mm dia. AllSpecPro (red/white) Halitec - main halyard (21m)

2000 Tuning Guide
2000 - an easy boat to sail, a hard boat to sail fast!
This blog aims to pass on the tips and lessons learned whilst trying, and finally winning, a 2000 National Championships.
If I have not bored you with the story of why Sarah and I became 2000 sailors, let me do it again. Sarah had ruptured her achilles whilst running for a trolley on the slipway at Rutland - watch out for the change of slipway width! When she had finally come out of the incline boot, the 2000 seemed to be a nice and safe environment to get back on the water. If you had asked me if I thought the 2000 fleet was tough and the boat was nice to sail before I had sailed one, the answer would probably have been no. I was wrong on both counts. The boat is comfortable and pleasing to sail well and the fleet has some very talented sailors.
The Nationals this year were in North Berwick hosted by East Lothian Yacht Club, and it fitted with the many other plans this year. I had sailed the Solo Nationals at North Berwick and we had found it to be super welcoming so we had it planned very early in the calendar. The evening walks were definitely worth the drive.
East Lothian Yacht Club excelled themselves again with a terrific team to ensure the event was the #bestregattaever! The race officer was excellent, a real seat of the pants sailor who could weigh up the tactics of the first beat to tease the sailors into some head scratching.
But the reason for this post is not to sell you why East Lothian Yacht Club is the best regatta site ever, but to pass on some of our 2000 racing tips whilst they are still in my head.
The most applicable phrase about 2000 sailing is that it is an easy boat to sail, but a hard boat to sail fast. We finally got it sorted and won the Championships, but it was never easy.
2000's can get exciting. Photo by Eric Robertson
The lessons learned along the way:
Never sit too far back downwind unless it's so windy you shouldn't really be racing. Some fast crews really do not leave the shroud. I know that is counter to normal sailing principles, perhaps it's because the hull is largely flat with a small kick up at the transom, so keeping forward uses the flat area to promote planing
Tackline of the gennaker can by eased out in light winds by as much as 5 inches. Then heel the boat to windward to bring it from behind the mainsail. You might like an adjustment on this line, tightening it as it gets windy
Gennaker head can be eased out by as much as 5 inches in light winds and perhaps as little as 2 inches in strong winds. The gennaker is rather small so the further away from the rig it can get the better
Centreboard should be able to go nearly flush with the top of the case. Replace the thick rope on the handle with some thin rope so you can achieve this. Do not push the board lower as this may damage the case. The science behind this is that the rig has been thrown over the bow of the boat to help speed up the downwind performance, so the centreboard then needs to move forward to promote some weather helm to help encourage you to keep the boat flat. No weather helm and you can be happy sailing heeled over, but that is very slow
Downwind in light winds sit as far forward as you can and try to promote some windward heel. Ease the kite to allow the now eased tack and head to help the kite to float out from behind the mainsail and soak (nearly running) as much as possible. You can also pull the centreboard up too as long as you are far enough forward as the centre of effort of the boat will move forwards with your weight allowing you to pull the board up almost completely. In this situation the helm is the balance. I actually found it hard to keep the windward chine in the water and was asking Sarah to sit more away from the mast. I was on the centre line which felt quick
Always use the jib on the most aft car position
The mast rake of 6570mm worked for me, measured from the top of the aft top gudgeon but with a shroud tension of just 150lbs. See my notes below on mast set up
Mast set up.
There are three schools of thought on the mast set up in the fleet. My set up was based on Jasper Barnham's set up for the mast, apparently he was a Firefly sailor which makes sense. To add some extra downwind pace we raked further forward, my spreaders were out and forward from neutral position. I had to use the mainsheet to keep the jib luff tight upwind and was not worried when I had to ease the mainsheet and add kicker to keep the boat flat. We were using the old Holt Allen mast.
Simon Horsefield set up; Selden mast, spreaders neutral so he can use more rig tension, but pushed out for more power.
Richard Hudson set up; Selden mast, no deflection on spreaders, neutral both fore and aft and out. The advantage of this set up is that you can use lots of rig tension and still get gust response.
Despite our three very different set ups we were all fairly similar speeds in the moderate winds.
Modifications to keep the crew happy.
Change the toe straps - see the related blog here.
A pair of adjustable Selden Auto Ratchets - do adjust the tension they work at with the small Allen key, they are surprisingly light and work a treat One of the best Selden products
Fit Harken 150 Aluminium Cleats on the jib sheet
Consider fitting a 2:1 jib sheet for windy weather
Fit a 6mm All spec pro Gennaker Sheet - you can take the centre core out in the middle to make a nice smooth loop to pass the Gennaker sheet around the forestay. Check out how to do a centre taper on All Spec Pro here, 9m should do it.
The centre taper is passed through the clew - the sheet is then passed through the loop to make a tidy smooth clew knot.
It looks like our 2000 is now sold. We are not sure if that chapter is closed for good as we do have access to another one should we be keen to come and play in the future, but for now we are going to put the time into the RS 800 and the RS Aeros, although a snowy weekend in January might change our minds as the 2000 is a warm dry boat with plenty of storage for hot drinks!
I hope you enjoyed the tips and can add more of your own in the comments below. I am sure the class is going to go from strength to strength. Kev O'Brian is your new chairman and is open to new ideas to promote class membership and participation. The committee are keen to promote the training aspect of the class and Simon Horsefield has already been starting to give some excellent coaching tips each morning this year. Keep up the good work guys, I am sure we will be back soon.
We are already planning to come back to East Lothian again for the RS Aero Nationals in 2019. We are certainly looking forward to seeing some friendly faces #bestregattaever!
Cover photo by Eric Robertson
Save Save

How to set up a new RS200....plus a few tweaks
Winter is the time for fixing and upgrading your boat. It’s not always the most fun thing to do but definitely worth it when the season comes. We have recently been sorting our new RS200 for the year ahead and here are our key hints and tips for rigging a brand new RS200!
Setting up the rig
Deflection:
The deflection of the spreaders is the key driver for setting the initial bend in the mast and is measured with no rig tension on the mast. The spreaders keep the mast in column with your desired set up by using the force through the shrouds to push on the mast. The deflection helps to induce bend into the mast to help mould the main into the correct shape and there are two ways of adjusting this; change the length of the spreaders or sweep them backwards by adjusting the inboard end.
The length of the spreaders will also dictate the side to side stiffness of the mast, the longer they are the less bend to windward will be allowed, in theory allowing the rig to depower less through the “slot” between main and jib. The “sweep” will induce fore and aft bend, with more bend flattening the main sail and therefore depowering the sail.
Measuring the length is simple, measure from the inboard end to where the shroud attaches to the spreader. Measuring the sweep is a bit more difficult. You measure the deflection at the midpoint of the straight line between where the two shrouds attached. The easiest way to do this is to tie a piece of twine between the two attachment points and then measure from the back of the mast track to the twine.
The settings that we aim for is: Length: 385mm Deflection: 135mm
A tweak that you can make is to have twist adjusting spreaders. These will allow easy adjustment and in some classes where you change all settings between gears you can adjust them on the water without having the issues of dropping pins.
Mast rake
The mast rake is how upright the mast is. This is measured by taking a tape measure from the top of the mast to the stern of the boat, in terms of a 200 to the highest point on the rear hatch housing. This must be done with the rig tension on. In order to ensure that the measurement that you take is replicated each time you need to make sure you measure the distance from the top of the mast to the black/white band by the gooseneck and make sure this is the same each time.
For us the measurements are as follows (apologies for the change in units): To gooseneck band – 540cm Mast rake to top of back tank – 21' 9" Rig tension – 29 (loos gauge)
We only sail with one setting and control the rest of the rig with the kicker as we are a slightly heavier team. Lighter teams tend to rake back when going through the wind range to as far as 21’6”.
When the tension is applied you should find that the mast is slightly inverted before the mainsail is hoisted.
Tweaks and tips Gybe Strop
The gybe strop hangs down from the inboard mainsheet block on the boom. It allows the helm to pull the boom over more effectively through the gybe by allowing them a 1-1 purchase. This is especially useful in breezy conditions where the boom needs an extra flick to bring it across. The gybe strop should be about 40cm long.
It is worth noting that the gybe strop cannot be used to pump the boom and this is stated in the class rules.
Mainsheet boom cover
This allows the mainsheet to run freely outside the boom, but it stops the mainsheet from hanging down at neck height through a gybe or tack when it goes slack. Obviously, this is a useful safety mechanism, but also a decapitated helm tends to lead to a capsize which is not fast.
Continuous control lines
On any boat you have sailed you are likely to have to go to a windward or leeward mark, needing to adjust the control lines, only to find that there is no slack left to allow you to adjust the controls. By making the lines continuous you will not have this problem. All you need to do is to run the lines thorough the whole system as per usual with enough extra line that you could sit on the opposite side holding it. Then you need to splice the two ends of the lines together. Rooster does a product called EasiSplice Continuous Control Line and they show you how to splice the ends in an easy to follow video here.
I would recommend using the Rooster Easysplice, but if you have had the continuous lines completed by RS PLEASE CHECK!!! In my experience RS have tied the 2 ends together with twine and this will not hold when under pressure.
Mainsheet bridle
My preference on the 200 is to have a 2:1 mainsheet so that I have more control when playing the mainsheet and it is also much less tiring on my arms. It is however detrimental to pumping downwind but this is a worthwhile trade off in my opinion.
The way to turn your mainsheet in to 2:1 is to put a block at the end of the bridals with the mainsheet running down through it, then back up and attaching to the eye at the end of the boom. You can attach the block with a simple adjustable splice in 12 braid Zero or Spectweleve depending on you colour and diameter preference as shown in Rooster's video. If you want to be really smart you can splice the mainsheet back to the block on the end of the boom.
One tip is to make the mainsheet block “float”. By this I mean use elastic to take up the slack in the bridals when they go loose. This will stop the bridals getting caught up with the tiller at key moments. The best way to do this is to thread the elastic through the bridal about half way down on each side and tie off, with the elastic going through the block in between.
Pro grip
The sides of an RS200, especially when new, can be very slippery. This can make it hard for the helm to feel in control downwind especially in a breeze.
We like to have pro grip in two places:
1) Back corner on the gunwhales. This ensures that the helm feels stuck to the hull during a wild downwind sleigh ride in a breeze. 2) On the thwart. This is actually most beneficial in light winds going through a gybe. It allows the crew to stay anchored to their position whilst the boat rolls through the gybe. This in turn means the heel of the boat is much more controlled as only one body (the helm) is moving and leads to a smoother gybe.
Water bottle holders
In the new boats a water bottle holder is attached under the thwart. This is very useful and keeps everything out of the way. This can be done using glue or by drilling through the thwart. If you use the drill remember the thwart is quite flimsy so take care.
In my old boat I used the clear space next to the string bag at the front of the daggerboard case. I put some large pieces of Velcro all around the area and then stuck the other side of the Velcro to the water bottles. This allowed the crew to chuck the bottle at the front of the boat and the bottle stayed there rather than rolling around our feet endangering our ankles!
Forestay take up
One of my pet hates is a floppy forestay. This happens after you have pulled the tension on and generally leads to the forestay getting in the way of the tell tails but luckily this is easily sorted. There are two ways of fixing this:
1) Use a longer piece of rope for the forestay tie off. You tie one end to the eye on the bow, which is then fed up to the forestay, back down through the eye and then tie off the other end using a bobble so the mast doesn’t fall down. With the remaining tail after the bobble, tie a piece of elastic to this and then tighten and tie the other end of the elastic back to the mast foot. 2) Tie the forestay off as usual. Take a piece of elastic and tie to the end of the forestay and tighten and tie off to the eye on the bow.
Either way should ensure that when you pull the rig tension on that the slack is taken up and the forestay follows the line of the jib luff.
Elastic everywhere!
Not really but there are some key pieces of elastic to have! (left to right, top to bottom)
1) Around the gunwhale at the shrouds. This allows the crew to tuck the spinnaker sheets under and this stops them going slack and falling over the bow upwind. 2) Take up on the bung. This stops the bung from falling back in to the hole once removed, however be careful not to make it too tight or you may not be able to keep it in the hole! 3) Centreboard retaining line. The centreboard has a habit of popping up when going downwind in a breeze which can lead to untimely capsizes. Tie a piece of elastic with a hook on round the back of the centreboard case, you can then clip this to the handle. The reason to use elastic is in case you run aground or similar the elastic will snap and save the board! 4) To help lift the toe straps. These can be tied anywhere but by lifting the toe straps it allows you to more easily get your feet hooked under after a manoeuvre.
Gybe set assist
This is probably one of my favourite hints. When you gybe set, the spinnaker can have a habit of getting caught inside the jib halyard and not getting all the way to the top. Tie some elastic or string from one shroud to the other, outside the forestay and jib halyard, but inside the spinnaker halyard. This should be done just below where the jib halyard comes out the mast. As it has some major ware on the jib halyard, I would choose Rooster's Dyneema Elastic.
Bobbles!
Everyone loves a bobble or rope stopper and they are important to make sure that knots stay the right side of loops and blocks. The key places to have bobbles are:
1) On the spinnaker retrieval line on the spinnaker side of the ring, if the knot pulls through then you won’t be able to hoist the kite cleanly next time round. 2) Top of the spinnaker halyard to ensure an enthusiastic crew doesn’t pull the knot into the mast. 3) End of main halyard to ease tying the halyard to the top of the sail. Just push a loop through the top then put the bobble through the loop, easy!
Trolley markings
Personalise your launching trolley!!! We have all been to an event where you come in and there are lots of similar looking trolleys and it takes you ages to find yours. Why not paint/tape/write on your trolley to allow it to be easily distinguishable? Our preference is tape on the handles, very important!
Next thing to do is go sailing! See this link to my YouTube channel to see what we have been up to over the year.
Hope you find this useful! Feel free to leave a comment if you have any queries or things you would like to add!
Save Save Save

Sandy Point x Rooster: New bags added for the 2025 Gifting Season
Two years ago, we teamed up with Sandy Point — a small local business just down the road from Rooster HQ — to launch a limited-edition run of repurposed sailcloth bags for Christmas 2023. What started as a one-off festive collaboration quickly became something much bigger.
You loved the bags, you loved the story, and the idea of giving sails a second life.
So instead of ending with the holiday season, the Sandy Point Collection kept sailing on.
And now, for the 2025 gifting season, we’re excited to share that the range has grown again, with four brand-new bag styles and new colour options added to the original favourites.
Why repurposed sails?
Sails lead hard-working lives. They’re exposed to sun, salt, strain, and endless days on the water. Once they’ve reached the end of their performance life, they’re notoriously difficult to recycle and often end up with no real afterlife.
That’s where Sandy Point comes in.
Together, we’ve created a way to turn these materials into practical, long-lasting bags — each one with a story stitched into the fabric.
Every Sandy Point bag includes a small internal label telling you exactly which sail it was made from. It’s a nod to where the material came from and a reminder that nothing goes to waste.
Meet Rory from Sandy Point
Rory is the hands-on sailor and between him and his team at Sandy Point Chandlery, they are the makers behind every bag. He’s the guy who knows his way around knotted lines, splicing, and the finer details of ropework — and he’s as laid-back as they come.
Here’s what he had to say about the latest collection:
“Working with Rooster has been a really natural fit for us. These sails have already spent a lifetime doing what they were built for, so giving them a second purpose feels spot on. Every bag still carries a bit of that history in the cloth, and that’s something I love about the process — nothing goes to waste, and the story doesn’t stop. Seeing the collection grow just shows that people appreciate gear that’s made properly and built to last.”
What’s new this season?
We’ve added four new styles to the Sandy Point line-up — designed for everyday life, whether you’re heading to the boat park, commuting, travelling, or spending the day on the coast:
A5 Sailcloth Wallet – perfect for travel documents, small tech, and daily essentials.
A4 Sailcloth Wallet – ideal for notebooks, tablets, and keeping things organised on the go.
Sailcloth Coin Purse – small, tough, and sized for cards, cash, keys, or pocket items.
Premium Beach Bag – a roomy, hard-wearing beach companion with rope handles, stainless hardware, a water-resistant base, and a zipped internal pocket.
You’ll also find fresh colour variations across the original styles — inspired by Rooster’s coastal heritage.
The Sandy Point Collection has always been about more than bags. It’s about supporting local craft, reducing waste, and making better use of materials that still have plenty of life left in them.
By working with a local maker and giving retired sails a new purpose, it’s good to show how technical materials can become durable, everyday gear without compromising on practicality or design.

RS Aero Over Deck Control Lines - Full Video
POST VIDEO NOTE:Please use a separate piece of line to attach the two blocks to the traveller eye. see image below:
This is to stop any chance of the two blocks and their 3mm elastic from tensioning the traveller in any way. This was required by measurement at the 2018 World Championships.
The story:
During the recent RS Aero World Championships, it became apparent that if I wanted to release the controls downwind efficiently that I would need to change the control lines to over deck take up style. The old style tended to get a little tangled downwind:
I was inspired by Steve Norbury’s version that I had seen at the Aero Southern Championships which I knew was class legal. Obviously, I have put some of my splicing experience into the kit to fasten the two Ronstan Shock Blocks in place and used Rooster’s EasySplice™ Continuous Control Line as it’s just so easy! I used the Ronstan Shock Blocks as they can be colour co-ordinated and are very light – which I guess is nice as the boat is so nice and light. I also used Selden 30mm Loop Top Blocks for the take ups in the video and have recently changed them to Allen 30mm Blocks .
Rooster has produced a kit with most of the splicing done, all you will have to do is ‘cow splice’ the Ronstan Shock Blocks onto a pre-made double loop 180mm line under the deck.
We suggest you use 2mm Spectwelve (an SK78 12 braided Dynema) for the take-up tidies and Rooster 4mm Zero a super low stretch UHMPE 12 braided line for the traveller. You will also notice that I have adopted the Rooster colours which have been used extensively in singlehanded sailing with blue for downhaul/ Cunningham, grey for outhaul and red for kicker or vang. Feel free to take the parts and ropes in the colours you are used to.
I used 5m of EasySplice™ for the outhaul system, although I did not have much line to spare so perhaps it’s worth taking 6m and losing a bit. Our kit is now 5.5m so you will need to first ensure your outhaul is maximum off.
Then join the outhaul when it can just go in front of the centreboard case with a little movement.
For the downhaul, I used 8m of EasySplice™, plus 1m of 2mm Spectwelve for the two side deck tidy’s and 1m of 4mm Zero for the traveller.
Tools:I like my tools so I tend to try and use them all. But if you are keen to do the whole thing yourself then you will need:
Serrated Scissors
2/3mm Pull Fid
4mm Push fid
Rooster EasySplice™ Needle Fid (I use the super thin needle for the EasySplice™ Control Line splice).
Needles and Waxed Whipping Twine (available on the Rooster website to finish off the joins in the control line.)
If you purchase the kit, then you will only need the EasySplice™ Needle Fid, twine and needle, although I am sure you would still find the Serrated Scissors useful.
Splicing TipWhen you cut the centre core out of easy splice, leave it as loose as possible. This will enable the other line to pass into it easier. Do not try and milk it to make it smaller as this will make it harder to pull the other end through it.
RS Sailing is the most forward-looking company I have ever been close to. I understand that they will be stocking these ‘Rooster’ upgrade kits in due course. I think it will make a significant difference to your Aero sailing enjoyment – if it could get any better!


