Kit Guides
Avoiding Common Kit Mistakes
Kit Guide
What's the Difference? - The Aquafleece® Robe vs The Aquafleece® Rigging Jacket
From a first glance, you may not notice too much difference between our Aquafleece® Robe and the Aquafleece® Rigging Jacket. And that’s totally understandable, after all they’re made from the same iconic Aquafleece® material, are available in the same colourways and just look like two long coats. But we’ve been listening to our customers as we’ve been meeting them at shows in the UK this year, and we feel as though they deserve a comparison spotlight so you can make the right choice. Similar they may seem, but let’s take a closer look at what makes these two coats completely different, and find out which one is the best match for you and your lifestyle. We’ll compare the fit, the price and the technical features and function of the two to help you decide.
Size
Getting the right size for your equipment and gear is essential for experiencing the ultimate enjoyment from your day. Learning the difference between the sizing options of our Aquafleece® Robe and Aquafleece® Rigging Jacket could be the difference between why you purchase one from the other.
Robe:
One size fits all (Junior available). This gives everyone room to have the option to use the robe as a changing tool. Wear the robe over your wetsuit, zip yourself in and remove your arms to comfortably get changed wherever you need. Adjust the cuffs to suit your arm length when worn as normal.
Rigging Jacket:
Comes in sizes; Junior, XS/S, M/L, XL/XXL and XXXL/XXXXL and is designed to be ever so slightly oversized, so you can fit your buoyancy aid under when transitioning from rigging to sailing. If you’re looking for more of a day-to-day style, this one might be a better option for you. The Rigging Jacket should come to your mid-thigh and the adjustable cuffs allow you to tailor the wrists to your arm length.
Length & Shape
We’ve thought very carefully into the shapes of our Aquafleece® Robe and our Aquafleece® Rigging Jacket. Their unique functions and uses mean the lengths are slightly different and here’s why.
Robe:
The ‘one-size for all’ fit means the robe is much longer in the body than the Rigging Jacket. The robe will come to your mid-calf, or your ankle at the very most. The length is designed to allow you to feel comfortable getting changed, and for keeping the elements off from your whole body after you have been fully submerged in the water. The Aquafleece® outer shell will keep the wind off you whilst getting changed too.
Rigging Jacket:
The coat should come to your mid-thigh at the front, and it has been designed with a lower tiered back to protect you and your clothing from wet surfaces when you sit down or lean. The longer back also allows for rain and spray to run away from your core, keeping you warm and dry for the rest of the day.
Lining
It’s the inside that counts the most, and that is certainly true if you’re comparing these two garments. It’s the lining of these coats that truly set them apart in design and purpose, and ultimately complete preference to the customer.
Robe:
The robe includes a fleece terry lining, which is fully removable. The lining is extremely warm and cosy in very cold weather and exposed elements, but acts double as a soft towelling material to dry you as you change. The lining can be removed completely, including the arms and hood, to allow you to wash the inside of your jacket, so you can freshen up your robe for your next adventure. This is the first changing robe on the market to have this ability.
Rigging Jacket:
Like our other Aquafleece® range, the Rigging Jacket has a soft and smooth ‘short’ fleece lining throughout, including the pockets. This makes the jacket more lightweight, but with the Aquafleece® windproof shell, this is still a great option for you if you’re prone to feeling the cold, but manoeuvrability is required.
Hoods
Not the most obvious comparison to make on coats, especially when made by the same manufacturer, but the hood could be the reason you pick one coat over the other if you’re looking at costs and technicality.
Robe:
The robe has a spacious hood. Just like the rest of the robe lining, the inside of the hood has a terry lining to aid drying your head and hair. The hood has a soft Aquafleece® shell which keeps the wind off your head.
Rigging Jacket:
The hood of the rigging jacket is much more structured than the robe, and includes a peaked cap to protect your face from elements such as rain and spray or as a block shield from the sun.* The Rigging Jacket also has a reflective patch on the top of the hood, which is visible when you wear it down, a great safety feature for off-shore sailing and walking in low visibility.
Cost
Comparing the cost between the two is an important part of piecing together the aesthetically set apart differences. The features listed indicate that the Rigging Jacket is in fact a more technical product and this is reflected fairly in the price point.
Robe:
£165
A competitive price for a high tech changing robe, the first on the market with the ability to remove the lining for the purpose of keeping your robe hygienic. The Aquafleece® material has a Polyurethane coating on the outside for water resistance, durability and flexibility. The Aquafleece® Robe being our largest Aquafleece® product, you would assume that it would be the most expensive in the range.
Rigging Jacket:
£172.50
The Rigging Jacket price attracts plenty of questions when we compare the two coats. If the Rigging Jacket is smaller in size and length, then why does it cost more over the heavier and larger Robe? The Rigging Jacket may have lighter properties at first glance, but when we take a closer look at the structured hood, this explains the slight price increase as the hood is much more technical than the Aquafleece® Robe’s.
Use
Depending on what it is you’re most likely to be doing, taking a closer look at how these coats were designed to serve the customer, the ergonomics that have gone into the process are fit for purpose. But depending on what that purpose is will be the decider.
Robe:
Primarily designed for the on-the-go, quick changing, watersports mad individual, the concept of the changing robe has stretched beyond the boat park in the UK. Customers are tending to use them for day-to-day errands such as commuting, walking the dog and even going to the shops. It’s hardly a surprise whilst our winters seem to get colder every year. The robe was created to give the option to change in the most convenient way, and giving the ability to wash this after use, but you can use it how you wish!
Rigging Jacket:
Rigging by name, rigging by nature. The rigging jacket was created to keep you warm and dry whilst you get ready for your day out on the water. It's also perfect for coaches out on the rib all day long. But like the robe it has transferring powers taking you from the boat park and beyond into everyday activities due to its lightweight feel but weather battling qualities.
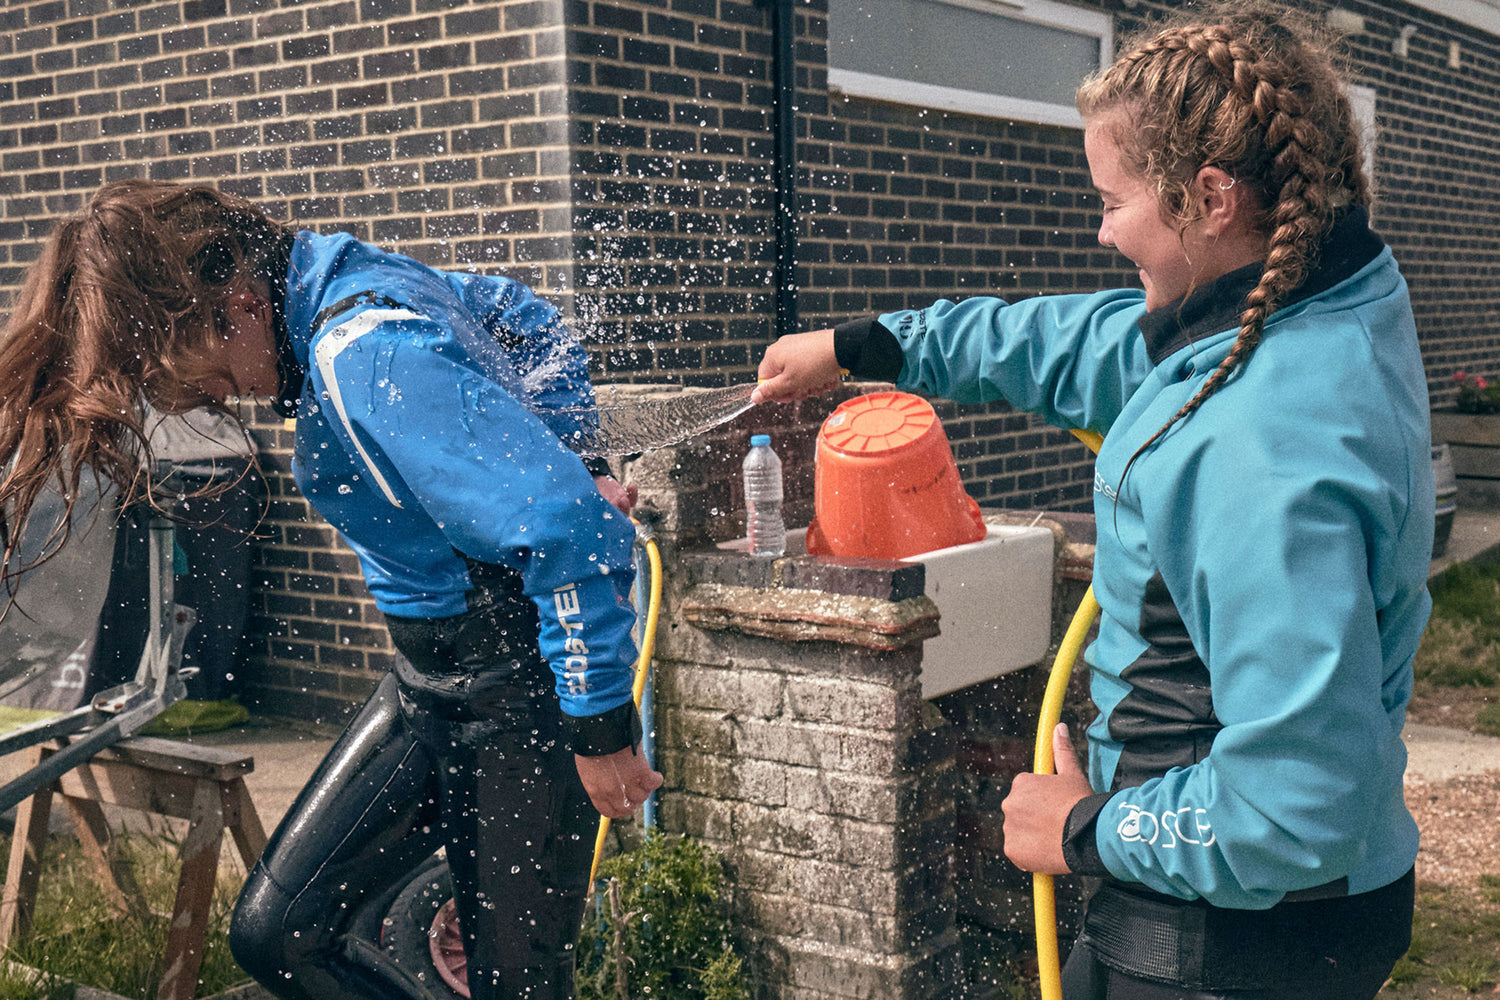
photo credit: AASailing
We hope that looking into more detail, we've have helped you understand the differences between the two, and have given you food for thought when choosing which one is better suited to you. If you’re still struggling to decide, then please feel free to get in touch with our friendly customer service team if you’re still not sure.
*Please don’t use the peak of the Rigging Jacket to protect your eyes from the sun alone, we advise you use proper UVA/UVB protection sunglasses
The Rooster 8.1 Class - Tuning Guide
Tuning Guide
By Steve Cockerill
With the possibility of sailors well in excess of 90kg sailing the Rooster 8.1, we have built in a large amount of luff curve the sail to support the leach – even when the mast is bending sideways under the full hiking load of the sailor. This means that the rig has to be set up differently to the Laser® Standard Rig sail that perhaps you may be more used to. If you were to merely use the equivalent vang (kicker) tensions of Laser® Standard Rig sail you would immediately notice, on an off-wind leg, that the luff of the sail is over-full and the shape of the sail is not balanced. This guide has been written to help you get the most out of your Rooster 8.1 Rig.
Pre sailing tips
If you are using the glass fibre sleeve in conjunction with a Laser® Standard Rig lower mast you will need to pack out the inner sleeve with tape to ensure a good interference fit with the lower mast and to pack out the joint of the upper mast to ensure a good fit in the extender tube. If you don’t ensure a good interference fit for both you may find your leach tension reduced which will reduce your pointing ability.
Upwind 0-6 knots
Kicker tension should be block-to-block or more (the term block-to-block means sheet the mainsheet blocks together and pull the slack out of the kicker) You may have to use some Cunningham to help open the top of the sail (take a look at your tell tails) you may also find that with a new sail you have some luff curve creases that are there due to the luff curve of the sail not matching the oddities of different spar bends – with more use the sail cloth will get a little softer and accommodate these differences. Use of the Cunningham will also take these creases out. I flatten the Outhaul to reduce the drag and try to match the depth in the head of the sail. Perhaps only hand width depth in the bottom of the sail.
In the picture perhaps only 3-4 knots I have used lots of Vang to flatten the luff of the sail and used some Cunningham to unlock the upper leach and take out some luff to clew creases.
Upwind 7-12 knots
The Vang tension needs to be increased with wind strength however, depending on your weight, you may be able to sail with less Vang tension at some point in the increasing wind. Personally at around 77kg there is no point for me where I need more power as I am on the light side for the rig. Therefore I go from underpowered and using Vang to unlock the sail to overpowered and needing Vang to de-power the sail very quickly. Again I flatten the sail in the base as I am not looking for power from depth as there is plenty of sail area, so I tend again to leave the foot at about hand width.
The picture shows no vang tension in 8 knots.
Upwind 12-20 knots
Again for me I am seriously overpowered and use immense Cunningham tension to windward Speaking to the heavier sailors who are sailing the boat well, the same is true. They have commented to me that the sail still needs a little wearing-in to get the best out of it, but they think that it is because there is less resistance to the use of Cunningham. Again Vang is used heavily and as a light person, I think I use more than the heavier sailors, but I am lucky that I am also quite agile as the increased Vang tension makes it hard to get under the boom! Heavier sailors are inclined to use less vang to de-power which at the same time gives the sailors more room to cross the boat. I think if you are new to Laser® style sailing, you might find the amount of Vang tension impedes your movement around the boat. Laser® sailors are often aware of easing the vang tension to tack in strong breezes. Control the foot of the sail with Outhaul tension to keep it as flat as possible without restricting the use of the Cunningham. Always get the Cunningham on first and pull the Outhaul on afterwards.
Upwind above 20 knots
You are looking for a challenge! Play the sheet constantly! I am not sure that there is a survival technique to employ. In the Standard Rig Laser® you might release the vang tension completely in over 35 knots in order to make good to windward so maybe this is worth a try. I also suggest you don’t ease the Outhaul!
Update from Steve, February 2009: At the Nationals Last year on the windy second day I decided to use as much Cunningham as I could put on. I used the old style both legs pull with straight arms. I figured that either the sail would break – or I would be able to sail fast against Greg Carey who is a big unit. It worked!! No I mean I was very very competitive. The mast bent on its own – a bit like a windsurfer rig – and I sailed to windward with no kicker – but with the sail block to block. It was so easy! I beat Greg to the first mark and the rest is history.
Downwind 2-6 knots
As the introduction explains, we have a lot of fullness by the luff of the sail to distribute across the sail profile so use plenty of Vang tension. You will find that easing the Vang will not make the leach open any more or increase the flow over the sail, which is different to the Laser® Standard Rig in which you would ease the vang lots on a run. Use the red camber line to give you a clear indication of the fullness across the sail. In this picture I am able to run by the lee despite the lack of wind and with lots of vang, as the increased vang makes the flow attach to the sail. If you understand calibrations better, I use 75mm (approx 3″) more tension (measuring the 75mm as a distance the double block and becket on a 15:1 Vang has travelled away from the boom key block) than I would have used in similar conditions with a Laser® Standard Rig. I release the Cunningham and tend to keep the Outhaul quite tight, perhaps eased a little only as I tend to think of projected area rather than depth.
Downwind 7-12 knots
Not much change to the above. Perhaps you can ease the Outhaul and Vang a little on a deep reaching run as the fullness should move with the wind flow.
Downwind over 13 knots
Downwind 13 knots and above – hang on and enjoy the ride! The helm should be relatively easy as the rig is well over the bow reducing any weather helm but sit well back.
Reaching 4-8 knots
Your problem will be to unlock the upper leach. In this shot you can see that many of the boats still have plenty of Vang tension and no Cunningham tension
Reaching in Over 12 knots
You might want to hang onto the Cunningham as you go off wind to keep the fullness forward and avoid too much weather helm.
Laser® is a registered trademark owned by Velum Limited and currently licensed for use in Europe to Laser Performance (Europe) Limited. Rooster Sailing Limited is fully independent of both Laser Performance (Europe) Limited and Velum Limited.
Protecting Your Assets - a Buyer's Guide for Spar and Foil Bags
Blog entry by Steve Cockerill
Putting your spars and foils into a cosy bag feels like the right thing to do. But if you are not careful, what appears to be a caring thing, might also be the worst thing. After sailing on salt water, we should wash our spars down with fresh water and where possible allow them to dry out. I tend to bag mine for safe keeping in transit. However, many bags use non-breathable fabrics and foams in their construction which trap any residual moisture. Moisture encourages dissimilar metal corrosion where stainless or Monel rivets react with the aluminium of the mast. The fizzing is proof of the corrosion taking place. What you need is a spar bag that breathes.Foils packed away in a non-breathable foil bag will sweat rather than dry out, causing Osmosis.
Ideally, you should dry off your foils before packing them away. Again salt water is a hindrance as it attracts moisture so a quick wash helps to remove the salt and gives it a chance to dry out. Look for foil bags that breathe.
What to Look For
Open cell foams with a breathable membrane is the safest option for both Spars and Foils. Spars and foils dry out naturally if they are packed damp which prevents dissimilar metal corrosion and osmosis. In my experience, many manufacturers are keen to save money on material cost which ends up costing you more in replacement spars and repairs to foils.
Below are some of the bags we make to protect your gear:
Padded Spar Bag 3650mm by 165mm (Laser Top Mast, Aero Top Mast and 9 Lower Mast, Lightening Upper and Lower mast)
Padded Spar Bag 2950mm by 165mm (Laser Boom and Standard Lower Master, Topper Upper, Lower Mast and Boom, Aero 7 Lower Mast, Aero Boom, Optimist Lower Mast and Lightening Boom)
Padded Spar Bag 2350mm by 165mm
Optimist Foil Bag
Foil Bag for the Laser/ILCA - also fits the Europe
4000 Rudder Bag
4000 Daggerboard Bag
Solo Rudder Bag
Solo Mast Bag
Europe Travel Mast Bag
Europe Boom Bag
Rooster® Duratex II™ - The Future of High Quality Neoprene Protection
Dinghy sailing can be super tough on your kit. Decks and cockpit floors that feature aggressive grip give the sailors security in the boat, whilst at the same time providing clothing manufacturers some interesting challenges.
Previous options tended to be to use harder wearing fabrics that offered less (or no) stretch, or compromise on the wear to allow freedom of movement.
The breakthrough came when we combined hard wearing polyester fibres with elastane to create Duratex II™. We have been integrating this across our product range over the last 12 months so you can feel both comfortable and unrestricted on the water whilst secure in the knowledge that your clothing is up for any challenge.All our current neoprene garments us Duratex II™, so when you decide to treat yourself, you know you are investing in the most durable and comfortable kit from Rooster®.
"Pocket-Rocket" Set Up Tricks: RS Aerocup
After unknowingly being given the nickname ‘Pocket-Rocket’, published on both the main event web page and in Yachts and Yachting, which I only found out about the day before the event, I now had to live up to the prestigious title and Malcesine, Garda was the perfect place to do so.
The first day of racing was forecast for light winds with a 1300hr start, which was spot on. There was about 5-9knots on the race course from the south with about 20 degrees of heat – perfect! I went out, not sure what the day would bring, but was pretty relaxed either way as the back drop of the mountains was enough to make it a good day to be on the water. In no time at all, the first race was underway and I surprised myself with a 1st place with a considerable lead. Two more bullets in the next two races left me coming off the water in a good place. I think that reading Sam Whaley’s recent blog after the UK nationals on sailing in light winds helped my upwind speed considerably, where I applied the following:
Minimal kicker. Only take up a bit of the slack when the main sheet is pulled in (end of boom in line with aft outer corner). As the wind slightly increased, the kicker can be tweaked an inch or two to compensate
Cunningham and outhaul relatively loose
Play the mainsheet as the main setting – let out in lighter patches, and pull in a bit in the gusts to promote an extra squeeze in height
Point 5-10 degrees lower to increase VMG
Taking this into the second day, I fired out another 1st place in the first race. With the second race came more wind seeing gusts of approx 14/15knots, where I found myself having to considerably de-power, being the smallest in the fleet - "Pocket" sized.
With this increased wind, the last race was to go either way. Luckily the wind decreased and shifted back to the right on the first beat (as it did when the wind decreased on the previous day), where I spotted it early and sneakily tacked on the incoming shift, coming in to the windward mark with a considerable lead on the rest of the fleet, who over stood the layline. Throughout the rest of the race, I was able to extend my lead to finish over a leg ahead of the rest of the fleet. I had to live up to the ‘Pocket Rocket’ name somehow!
Going into the third day with all race wins, it was then a challenge (set in the bar) to try to finish the regatta with a straight set of wins, which I knew would be difficult in the stronger forecast morning winds. The first race was at 8.30am!! Once on the water, I was ready for a day of max hiking and max de-powering to maintain my position. The fight was definitely more difficult with much closer racing, only getting one race by half a boat length on the finish line, but I managed to achieve my goal – somehow!! Walking was a bit of a challenge when I came off the water! What made me quick for a lightweight was:
Cunningham – pull on as hard as possible
Kicker – pull on as hard as possible, this helps the sail to spill air out the top of the leach when the mainsheet is let out. It’s amazing how much effect pulling on the cunningham and kicker has on the top leach area of the sail if you look up
Outhaul – still relatively loose to power through the waves. Because I had de-powered the sail so much everywhere else, I needed some shape to it in order to move.
Play the mainsheet a lot to keep the boat flat/constant heel
Hike until your quads feel like they might potentially tear!
So my first win in the Aero is complete in true Pocket Rocket form! Makes a difference to my usual style of losing it on the last day/race. Also, no OCS’s or black flags - another personal record!
The event was organised brilliantly at Fraglia Vela Malcesine, and Peter Barton, once again, didn’t fail to disappoint with his enthusiasm and hard work throughout the event. It also wouldn’t be the same without the great bunch of sailors both on and off the water. Got to thank my dad for driving all the way with my boat as well - cheers Dad!
Looking forward to the next one!
Kate Sargent
Tell Tales or Tails?
I am keen that you start telling tales that Rooster now has a Teflon® impregnated wool tell tails set that enables it to work in the wettest of conditions. The picture shows the red Teflon® coated tell tale verses the green untreated tell tails. Our tests have shown that the teflon impregnated tell tales take up to 90% less water than normal tell tails. This leaves them free to fly whatever the weather. If you are like me, then your tell tales are probably the most important sail setting device you will ever use. I recall seeing a fellow Finish sailor at a major European event sailing with over 250 sets of tell tails on his Europe sail. It resembled a hedgehog rather than a sail - but the different angles the tell tales took were fascinating - perhaps that's why he was so fast - we were more interested in his sail than our own!
Gear Guides
Need help finding best kit for you? we got you covered.
Product Support Hub
Videos and instructions to give you tips and tricks.
Garment Care
The right care helps your gear perform at its best and go the distance.
The Blog
Discover tips, tricks and stories from the Rooster team and guest writers.
Revive
Need repairs? Our trusted local partner has you covered.
Custom Clothing
Custom performance clothing for clubs, events, and organisations.
- Choosing a selection results in a full page refresh.
Select Store
EU
US